In order to add Custom Fields you must setup a Marketing Custom Object first. For more information on creating Standard Custom Objects and Workflow/Pipeline Custom Objects please review the associated articles.
Add a Custom Field
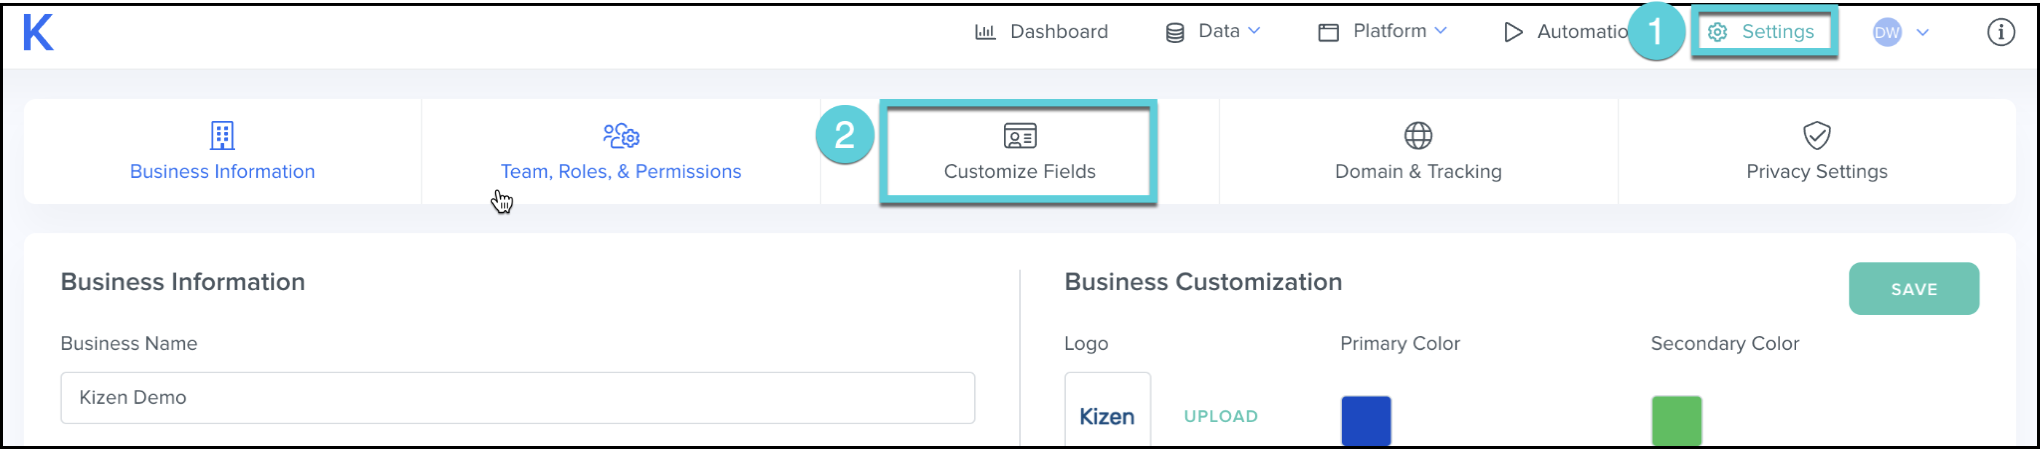
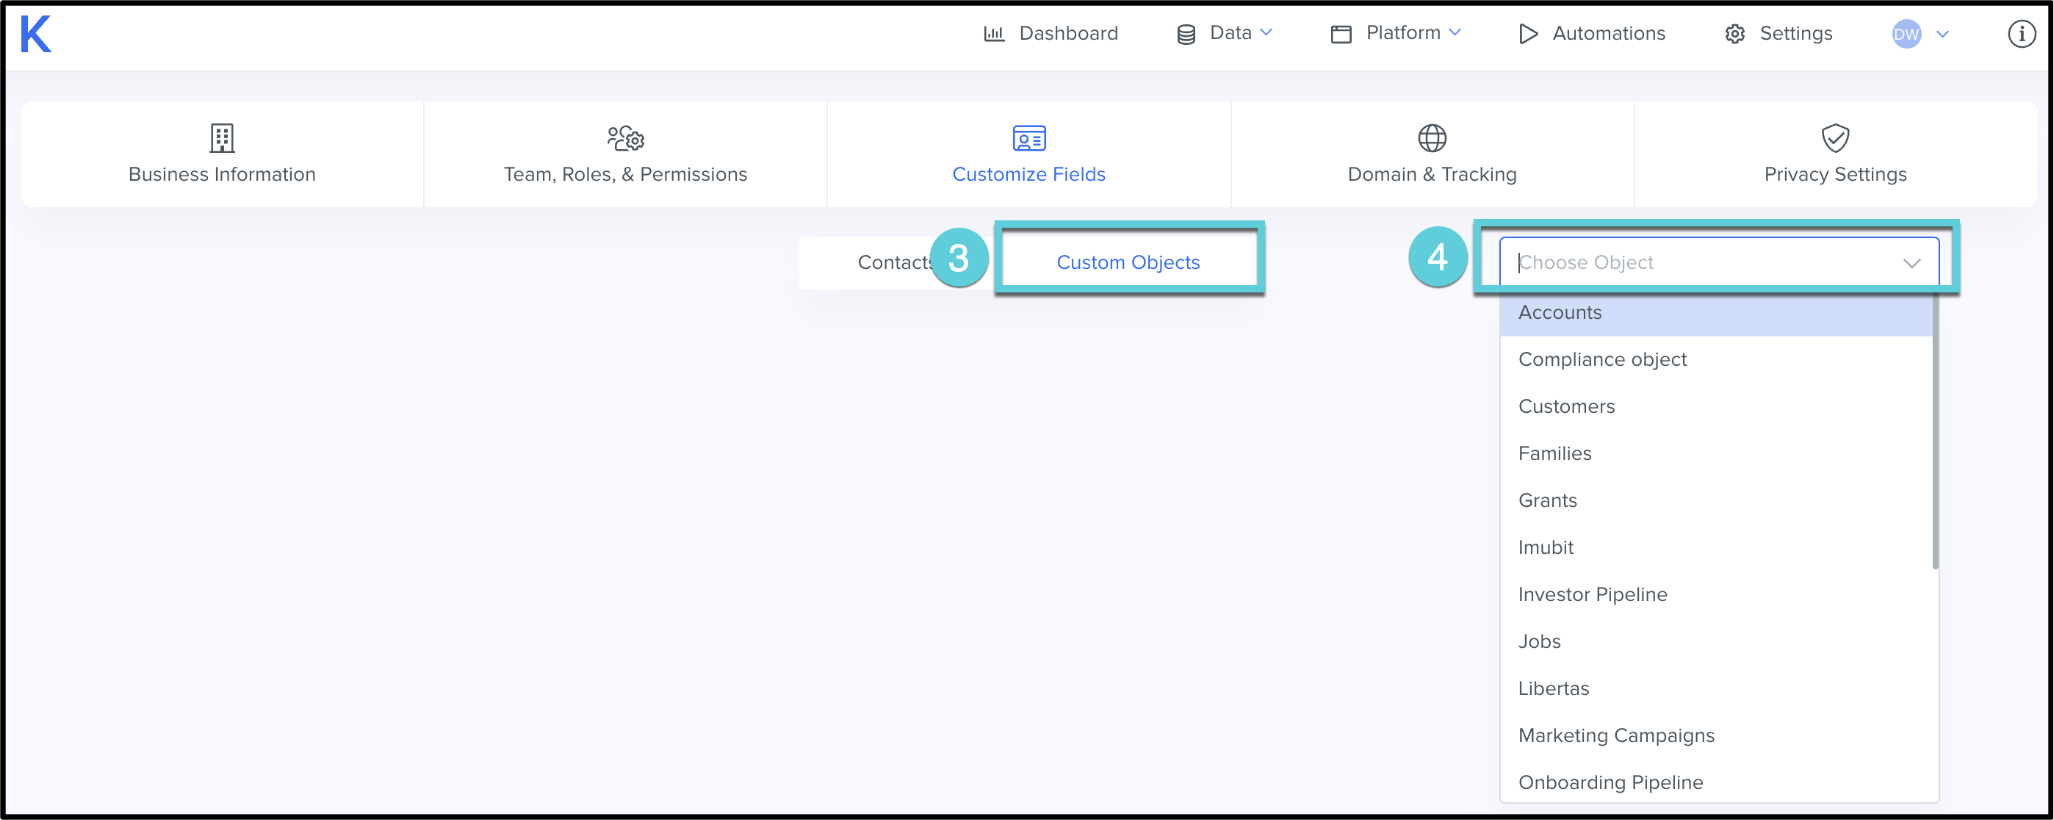
- Click Settings from the top menu bar
- Click Customize Fields
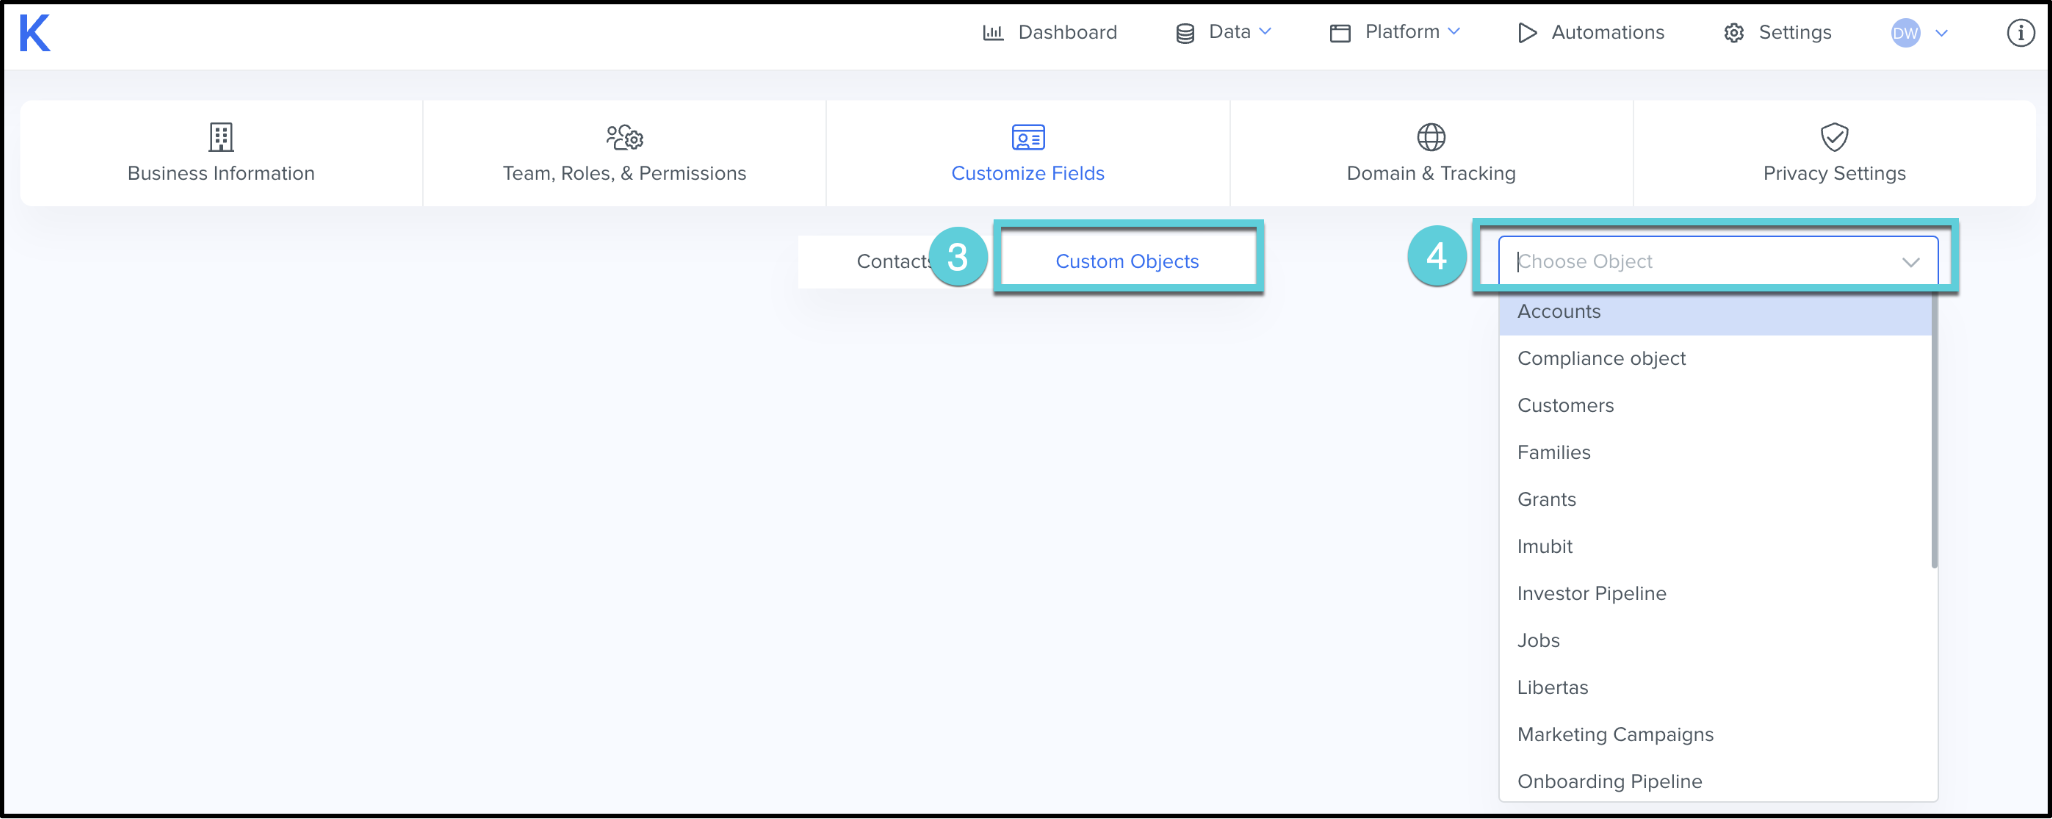
- Click Custom Objects
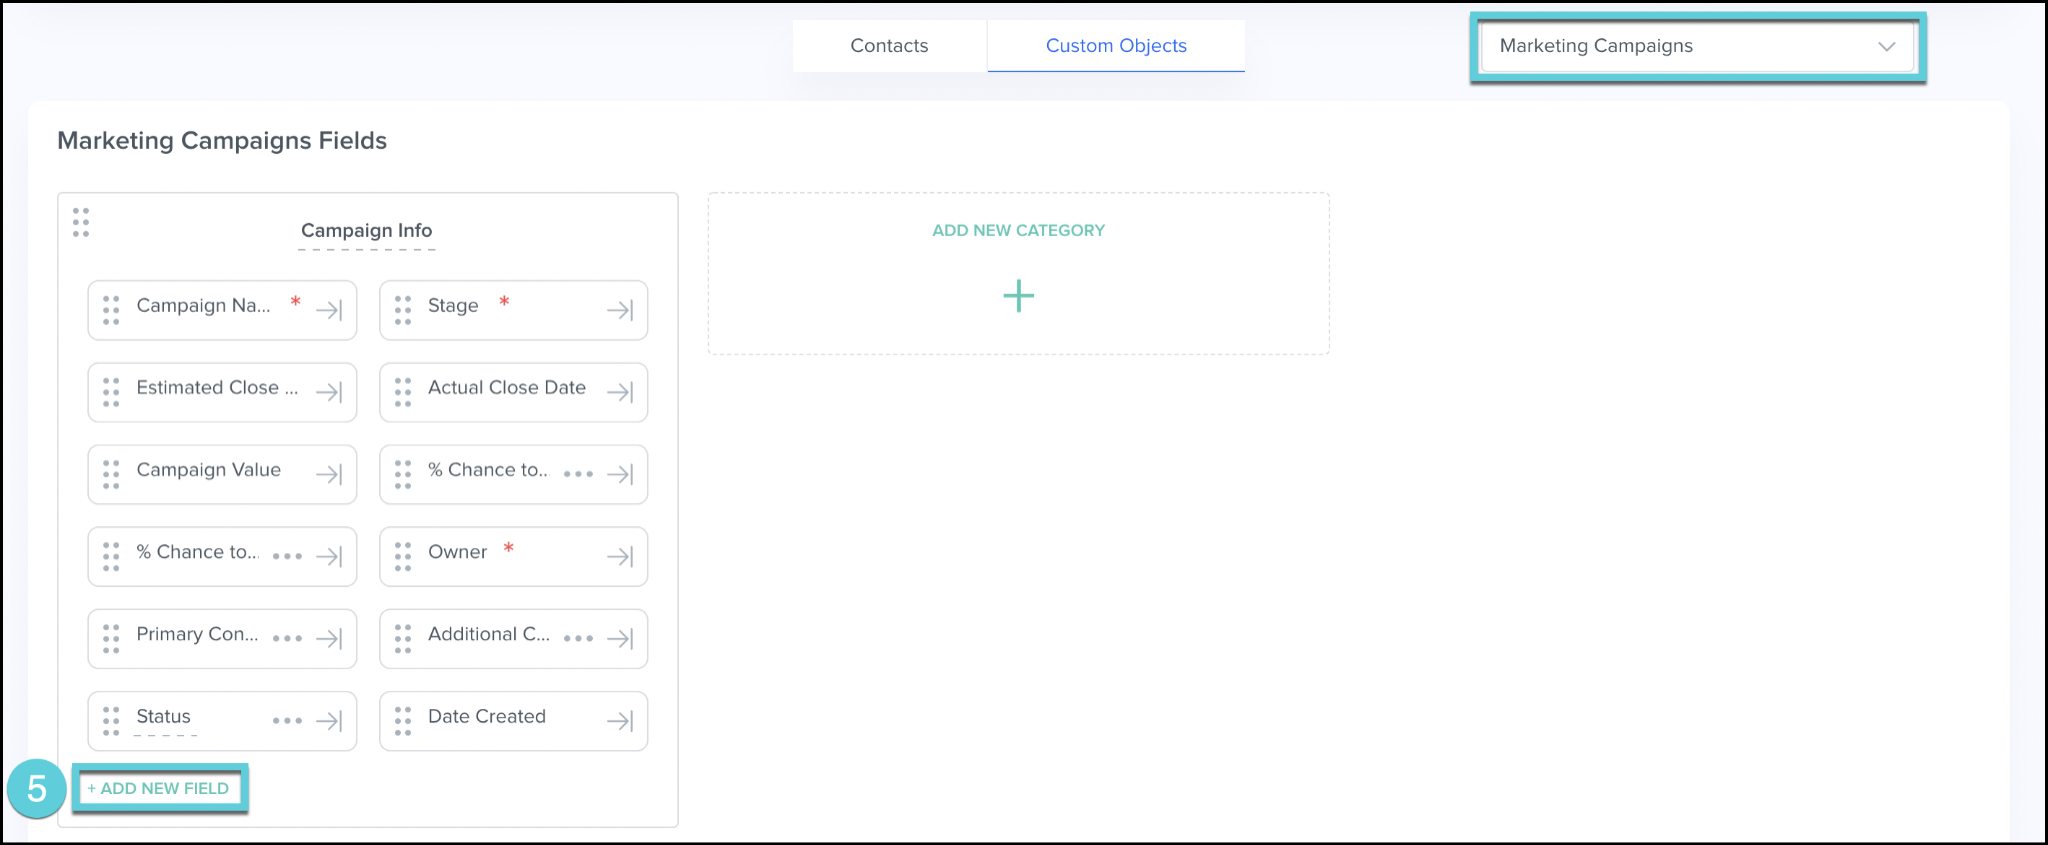
- Use the dropdown to navigate to the Marketing Custom Object you would like to relate the Custom Field to
- Find the appropriate category, click Add New Field
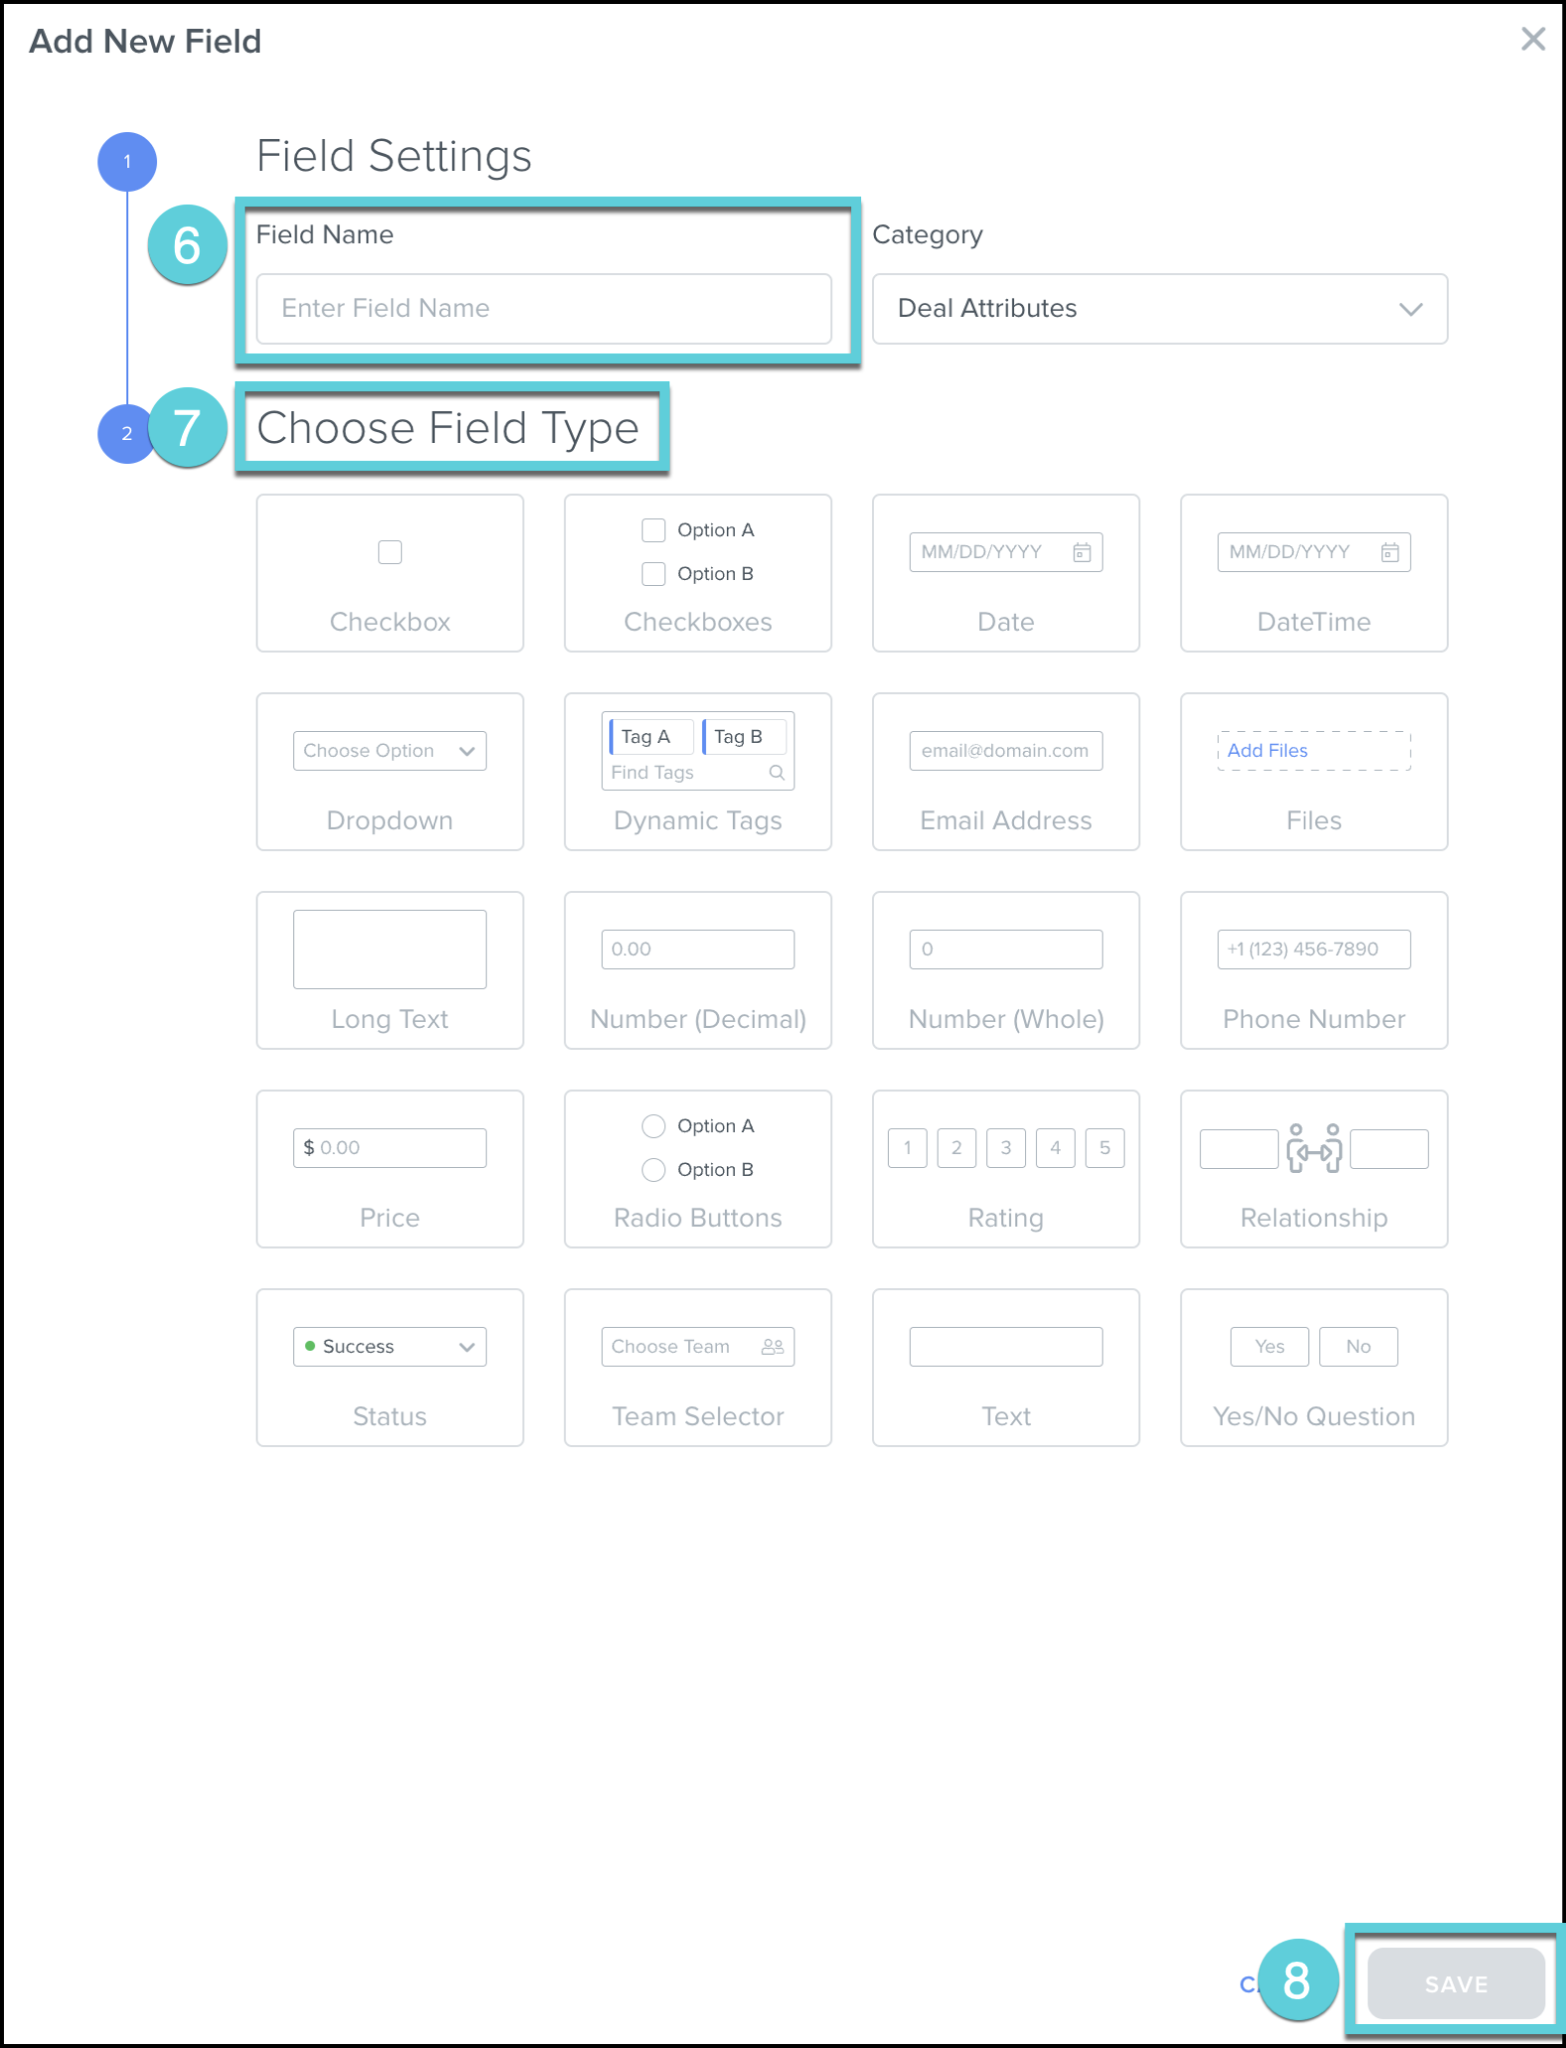
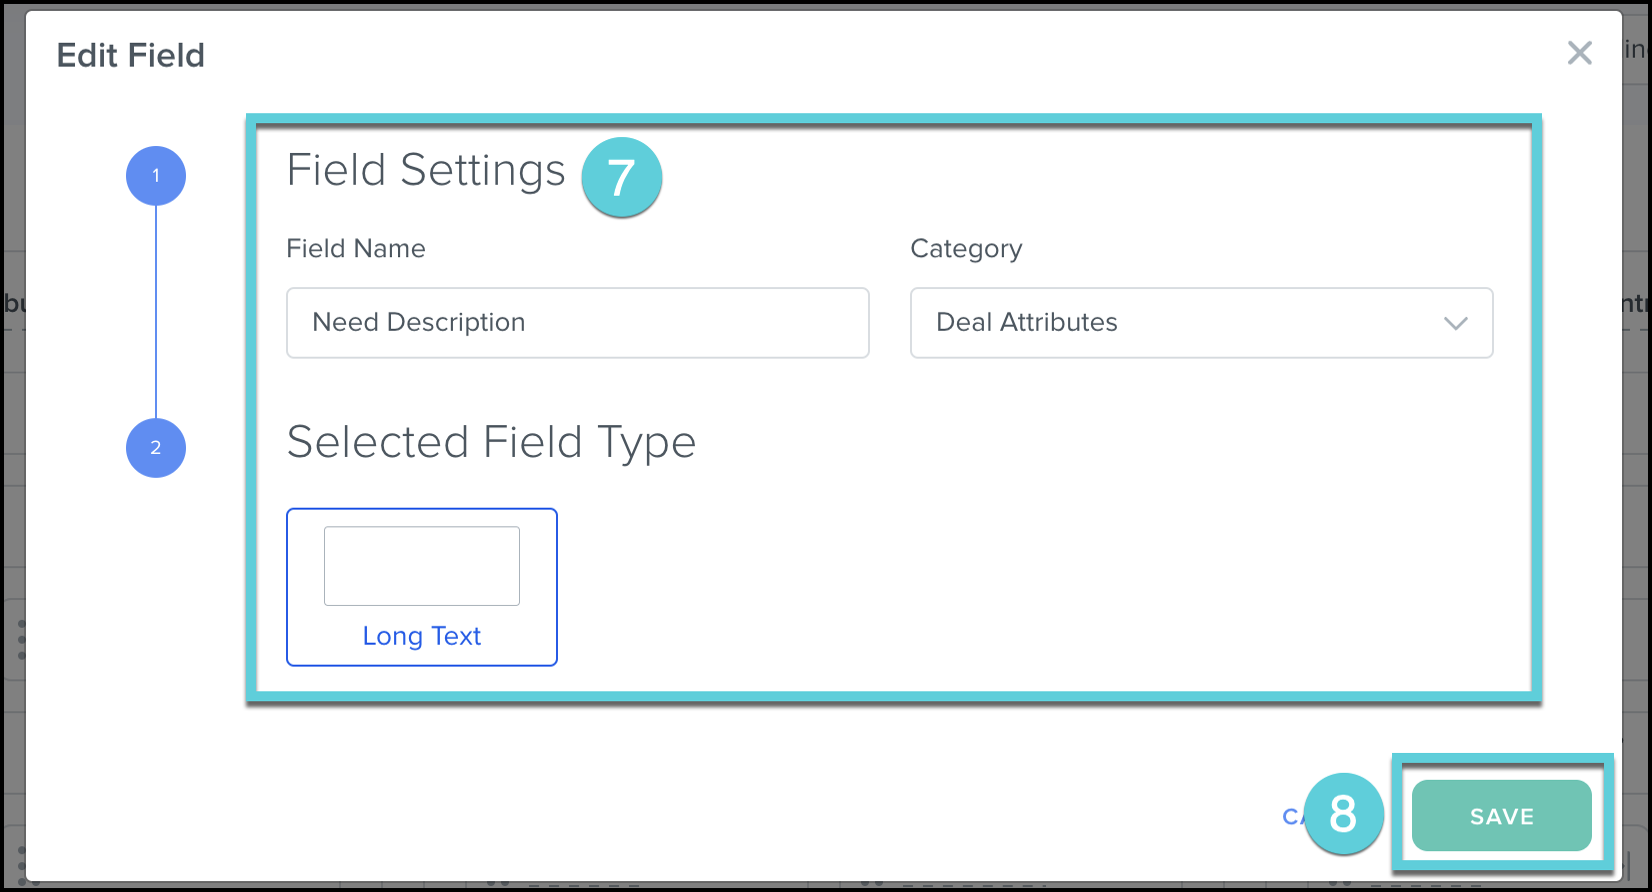
- Enter the Field Name
- Choose the Field Type: Based on the chosen field type, additional settings may need to be configured in the pop-up
- Click Save
Edit Custom Field
- Click Settings from the top menu bar
- Click Customize Fields

- Click Custom Object
- Use the dropdown to navigate to the Marketing Custom Object you would like to edit

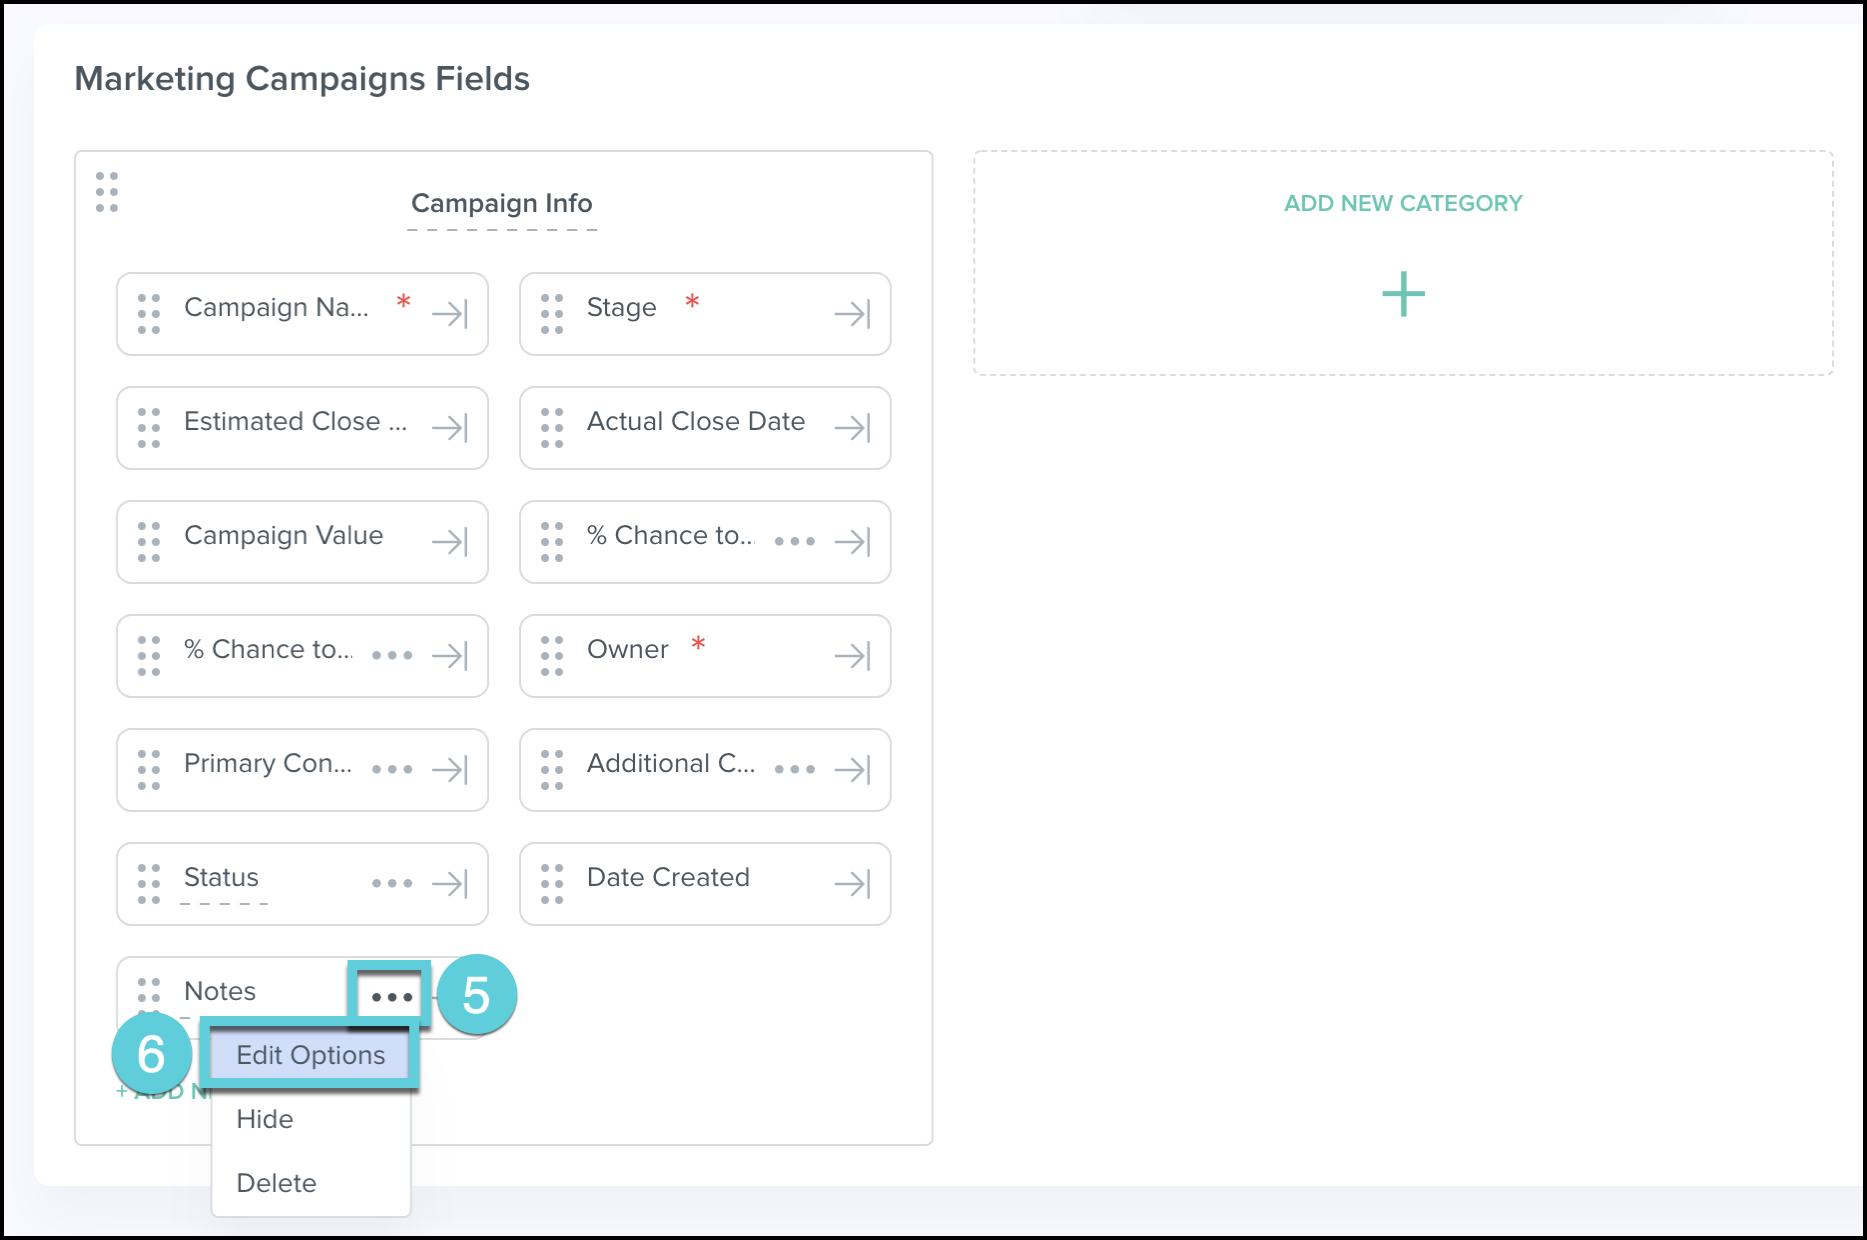
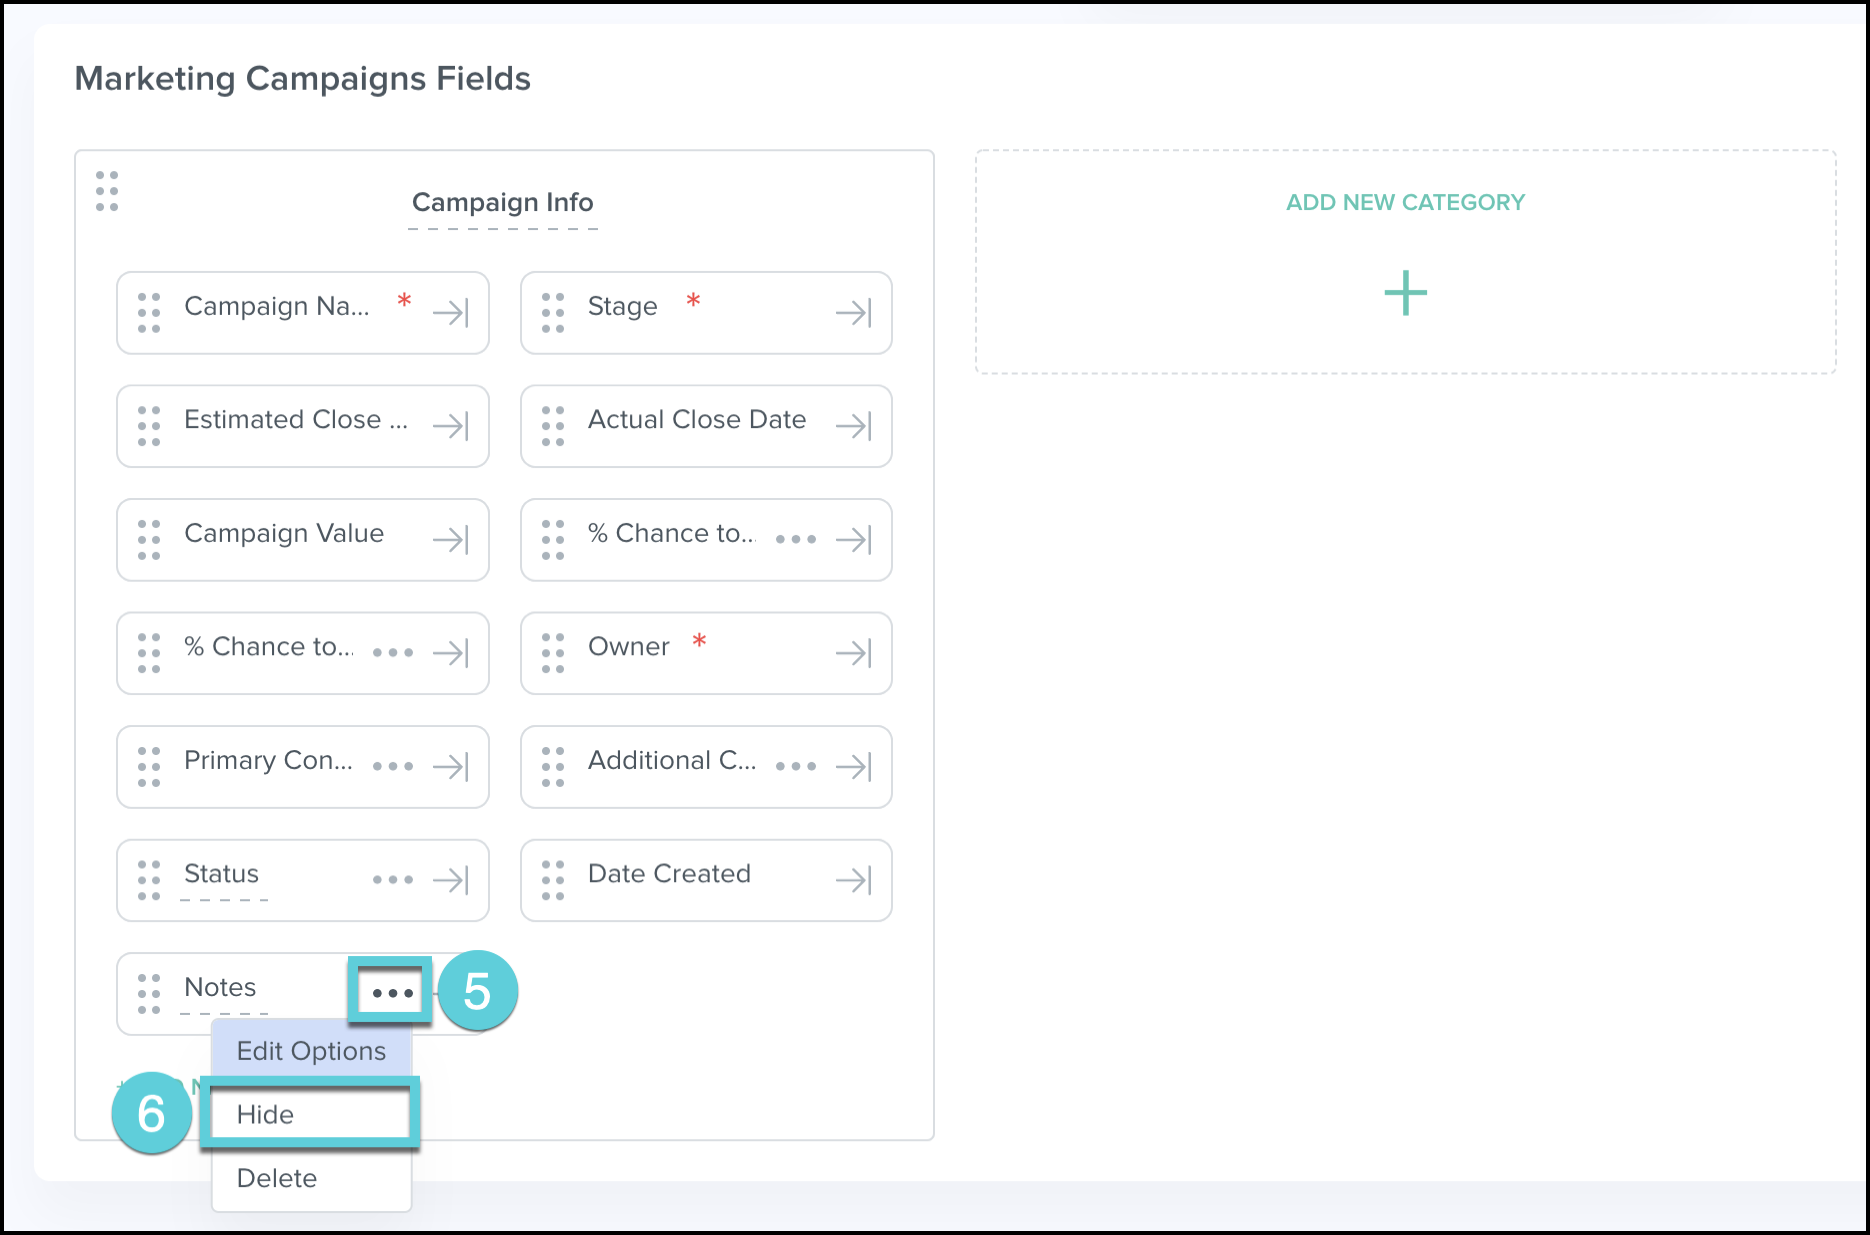
- Click on the … Custom Field
- Click Edit Options
- Make the necessary changes
- Click Save
Delete Custom Field
- Click Settings from the top menu bar
- Click Customize Fields

- Click Custom Object
- Use the dropdown to navigate to the Marketing Custom Object you would like to edit
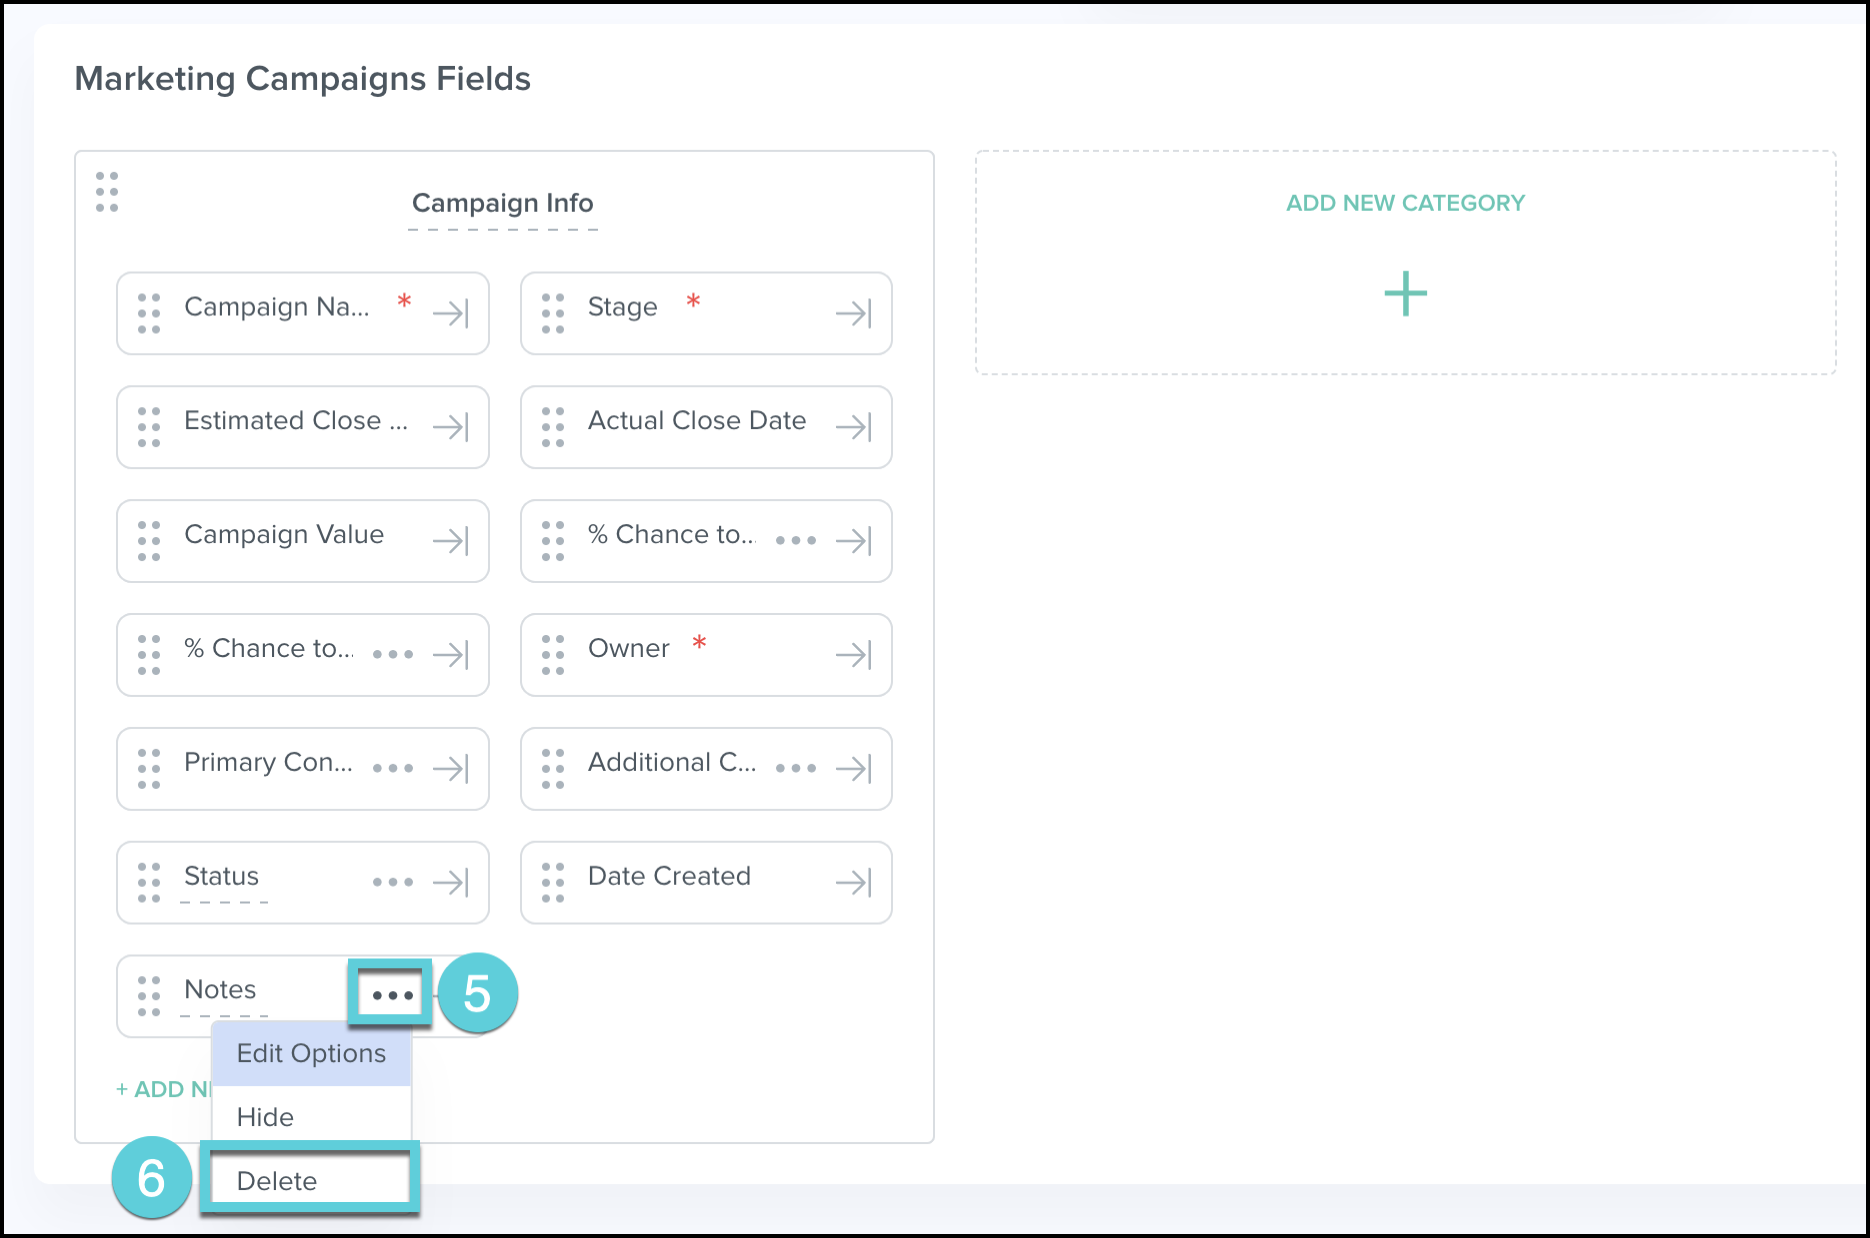
- Click on the … Custom Field
- Click Delete
- Confirm Delete - this will permanently delete the Custom Field. Please ensure this custom field is not included on any forms, surveys, automations, or other tools in Kizen prior to deleting it
Hide a Custom Field
- Click Settings from the top menu bar
- Click Customize Fields
- Click Custom Object
- Use the dropdown to navigate to the Marketing Custom Object you would like to edit
- Click on the … Custom Field
- Click Hide
Reorder Custom Fields
- Click Settings from the top menu bar
- Click Customize Fields
- Click Custom Object
- Use the dropdown to navigate to the Marketing Custom Object you would like to edit
- Select the recorder icon
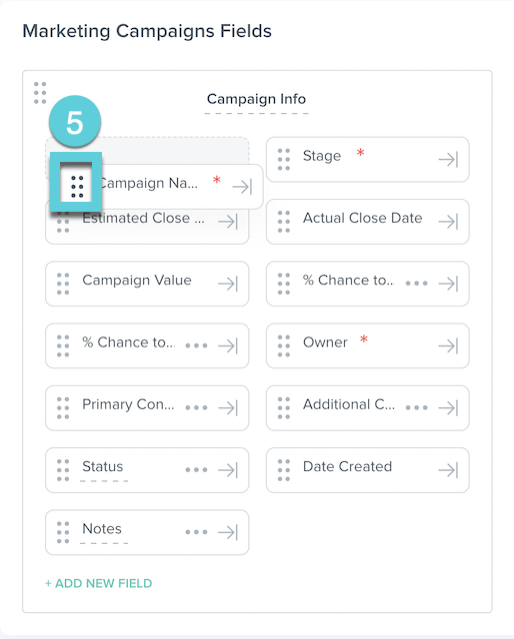
- Drag and drop the Custom Field to the new location in the Category