Automations allow you to automate and personalize your customer's journey. Automations can be used to follow up with leads, remind customers of other purchase opportunities, remind team members to contact a lead, and even send a customer a happy birthday message!
Automations consist of Triggers, Actions, Conditions, and Delays.
In this example, we'll be taking a look at how we can utilize Kizen Sales CRM to make sure a deal never slips through the cracks.
In this automation, we'll start with an initial sales call being logged. Kizen will then assign the sales rep to schedule a follow up call. If the follow-up call is not scheduled, Kizen can remind the sales rep after a particular amount of time. If the follow-up call still has not been logged, Kizen can escalate by notifying a Sales Manager.
Add a Sales Nurture Automation
- Click Automations from top menu bar.
- Click New Automation.

- Enter the Automation Name. (Example: Sales - Ensuring Best Practices)
- Choose the Automation Object. (Example: Sales Pipeline)
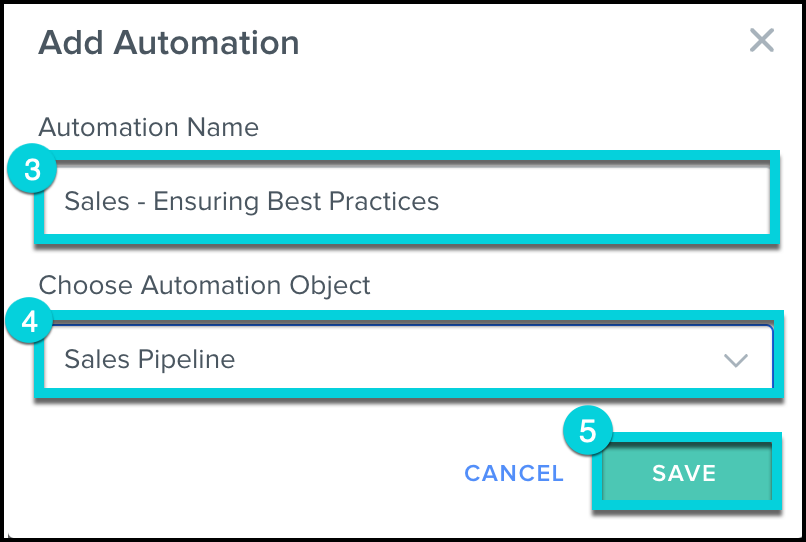
- Click Save.
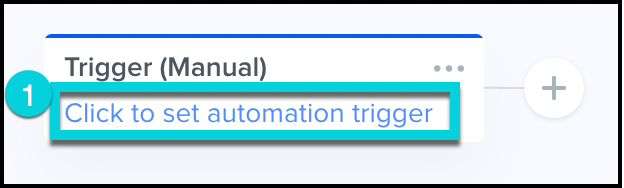
- Press 'Click to set automation trigger'
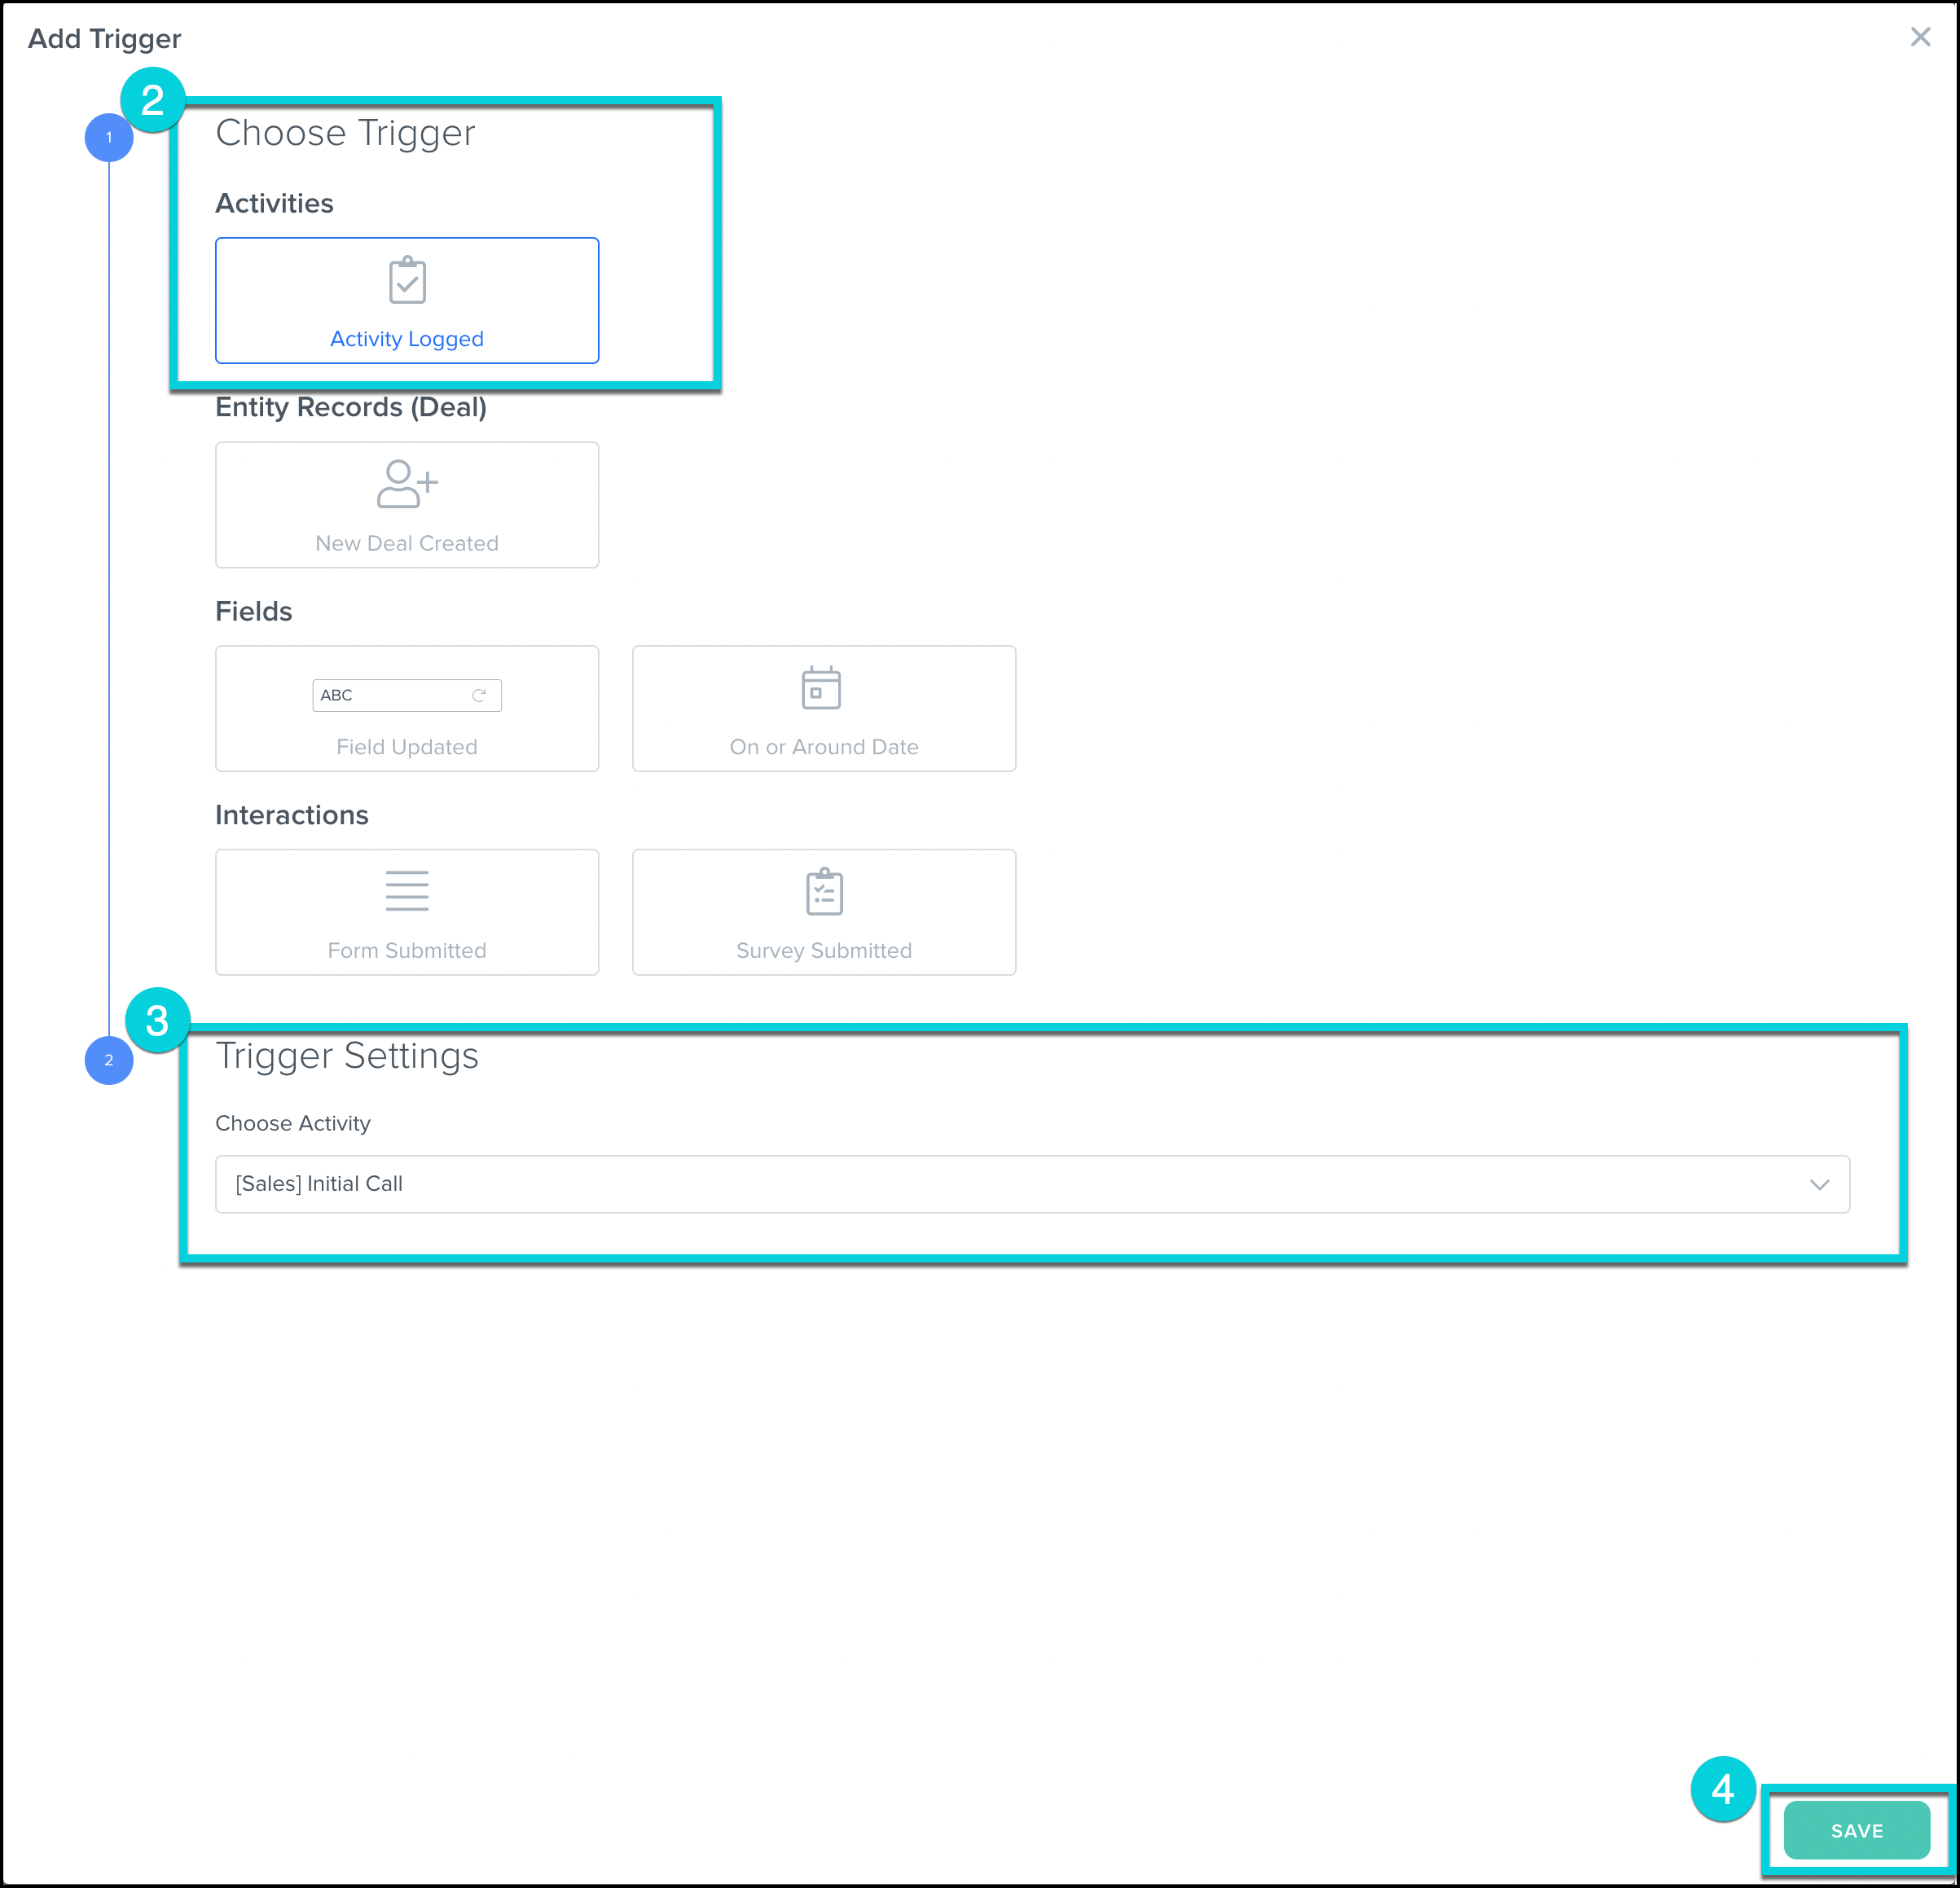
- Click Activity Logged.
- Under Trigger Settings, choose your activity. (In this example, we'll use "Sales: Initial Call")
- Press Save.
- Add an Action to the Automation.
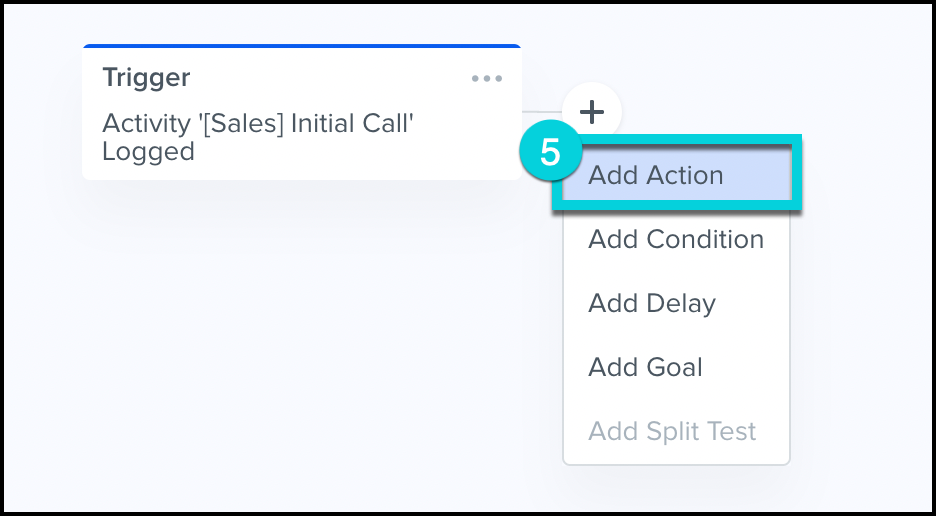
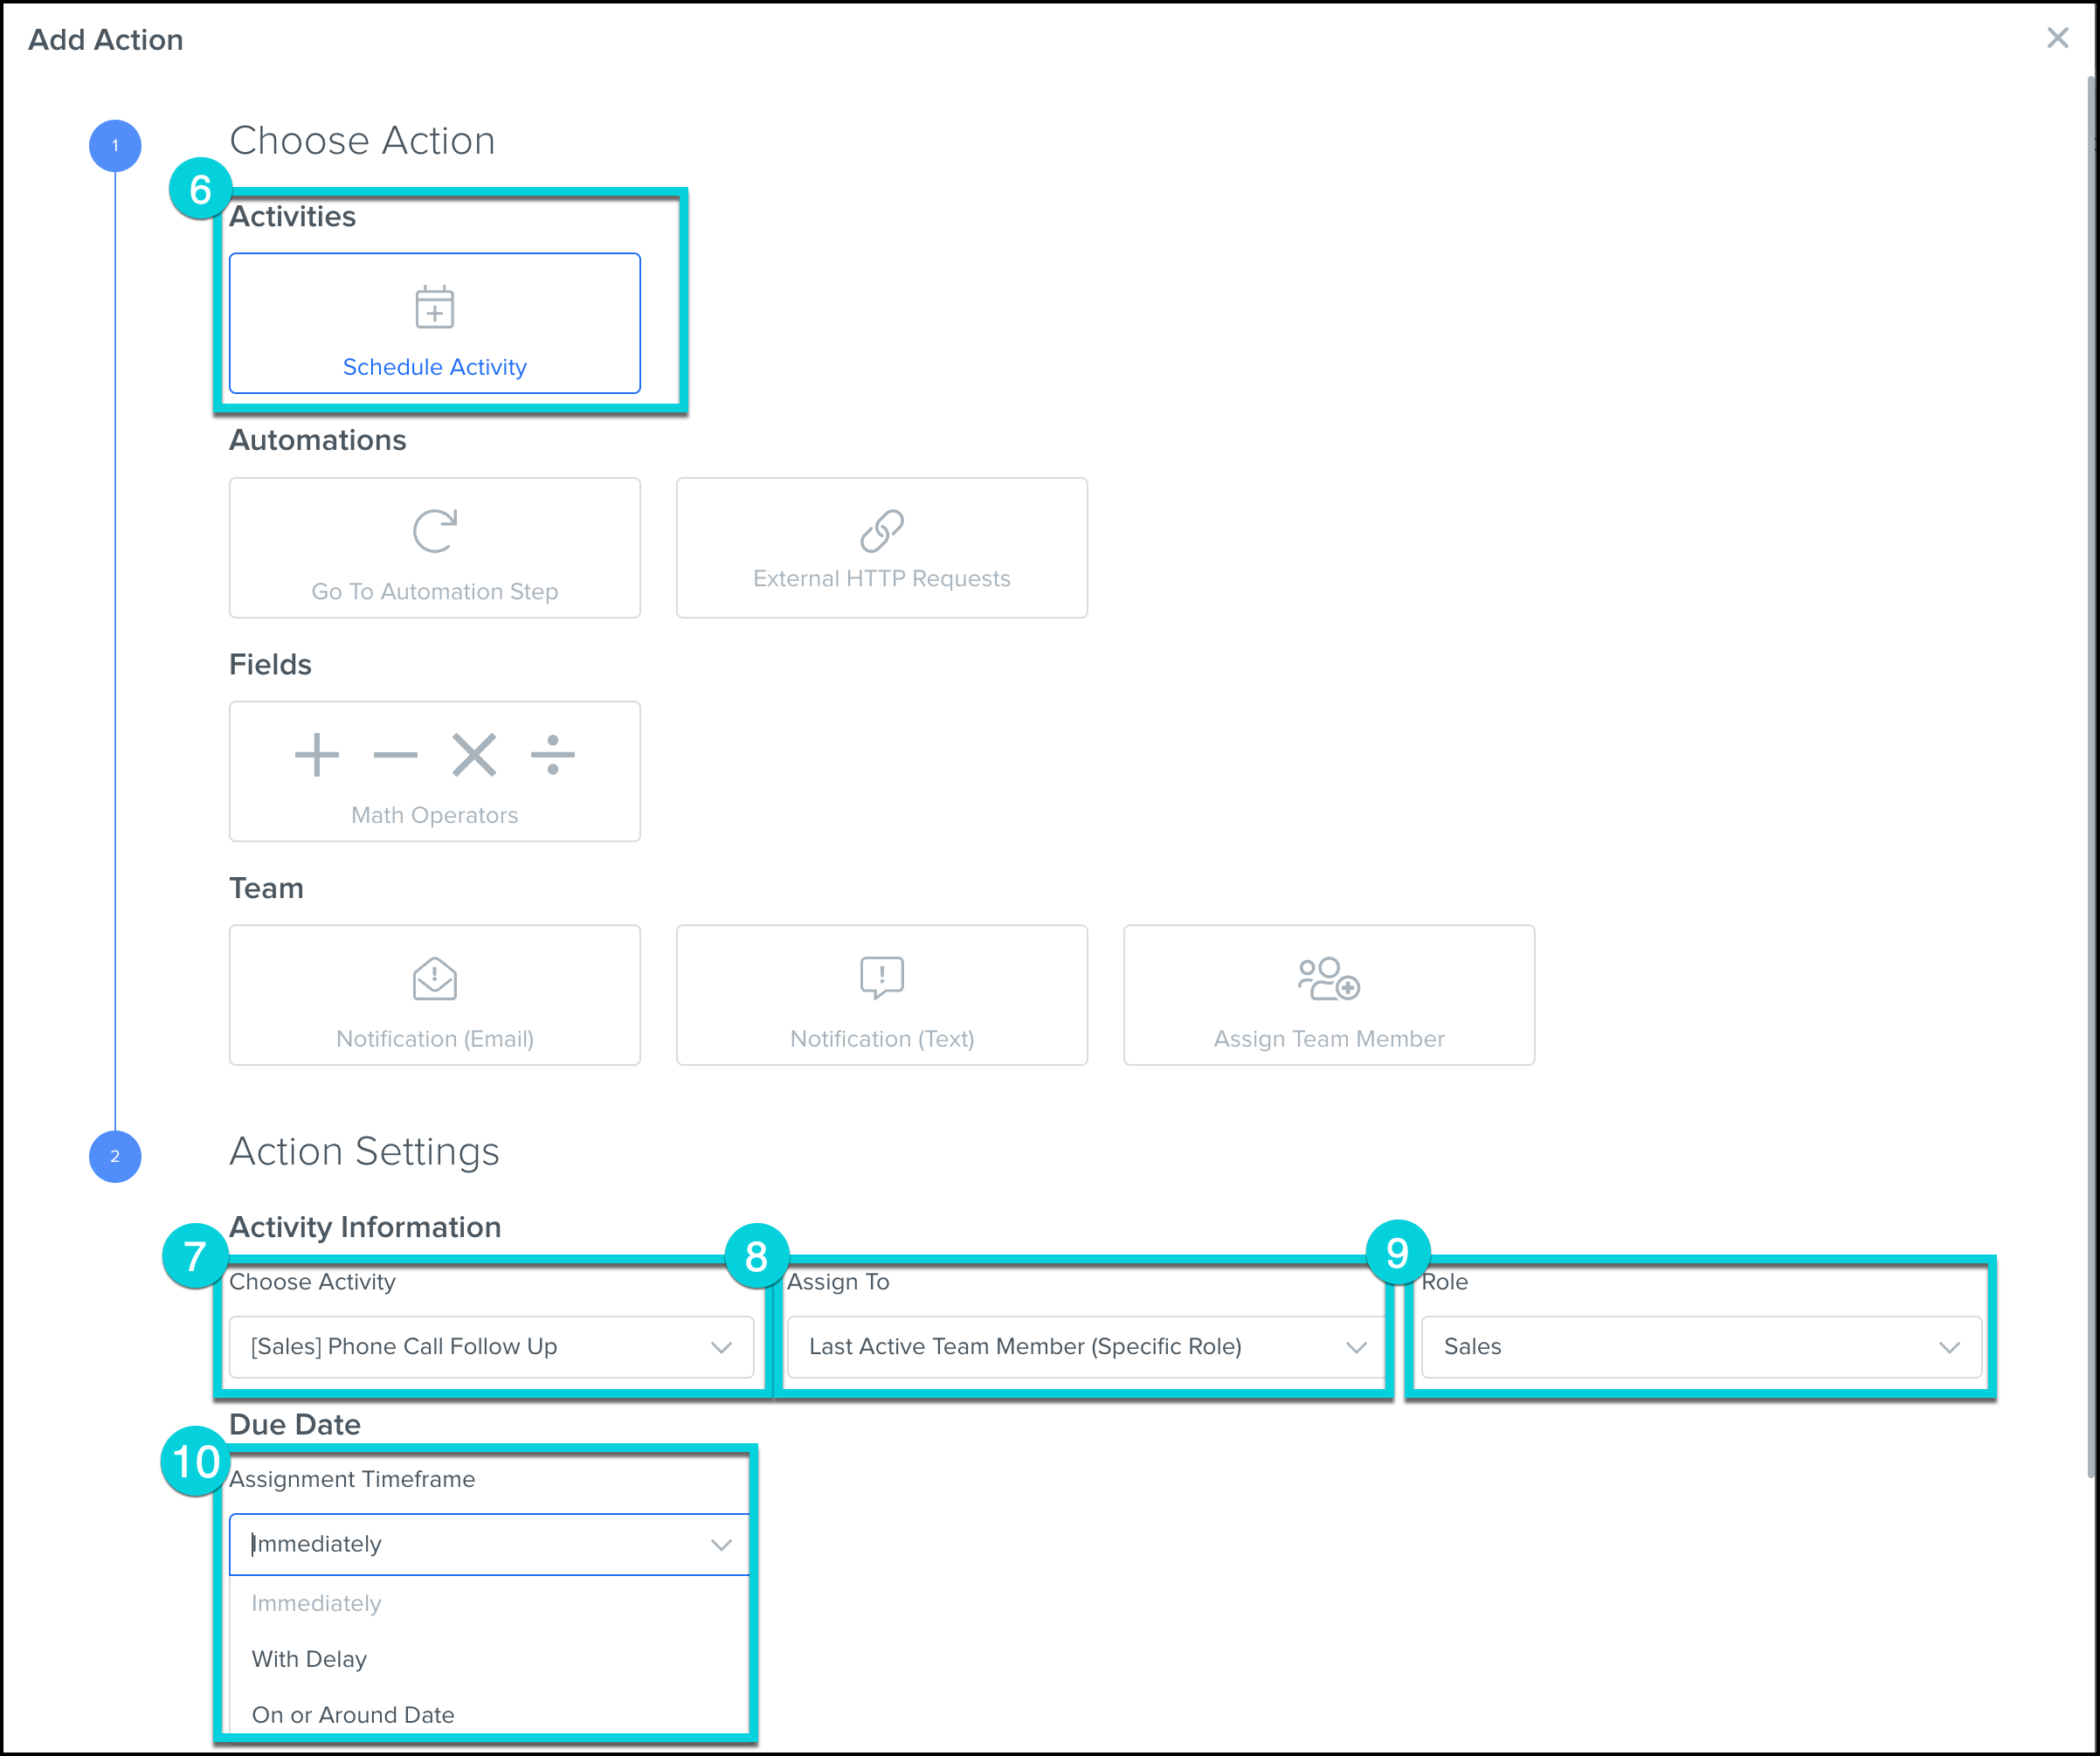
- Under Choose Action, select Schedule Activity.
- Under Action Settings, choose the Activity you'd like to schedule next. (In this example, we'll schedule a Sales Phone Call Follow-Up)
- Under Assign To, select which team member you'd like to assign the activity to.
- Under Role, clarify which role the assigned team member should be in.
- Under Due Date, select between the options of: 'Immediately', 'With Delay', or 'On or Around' Date.
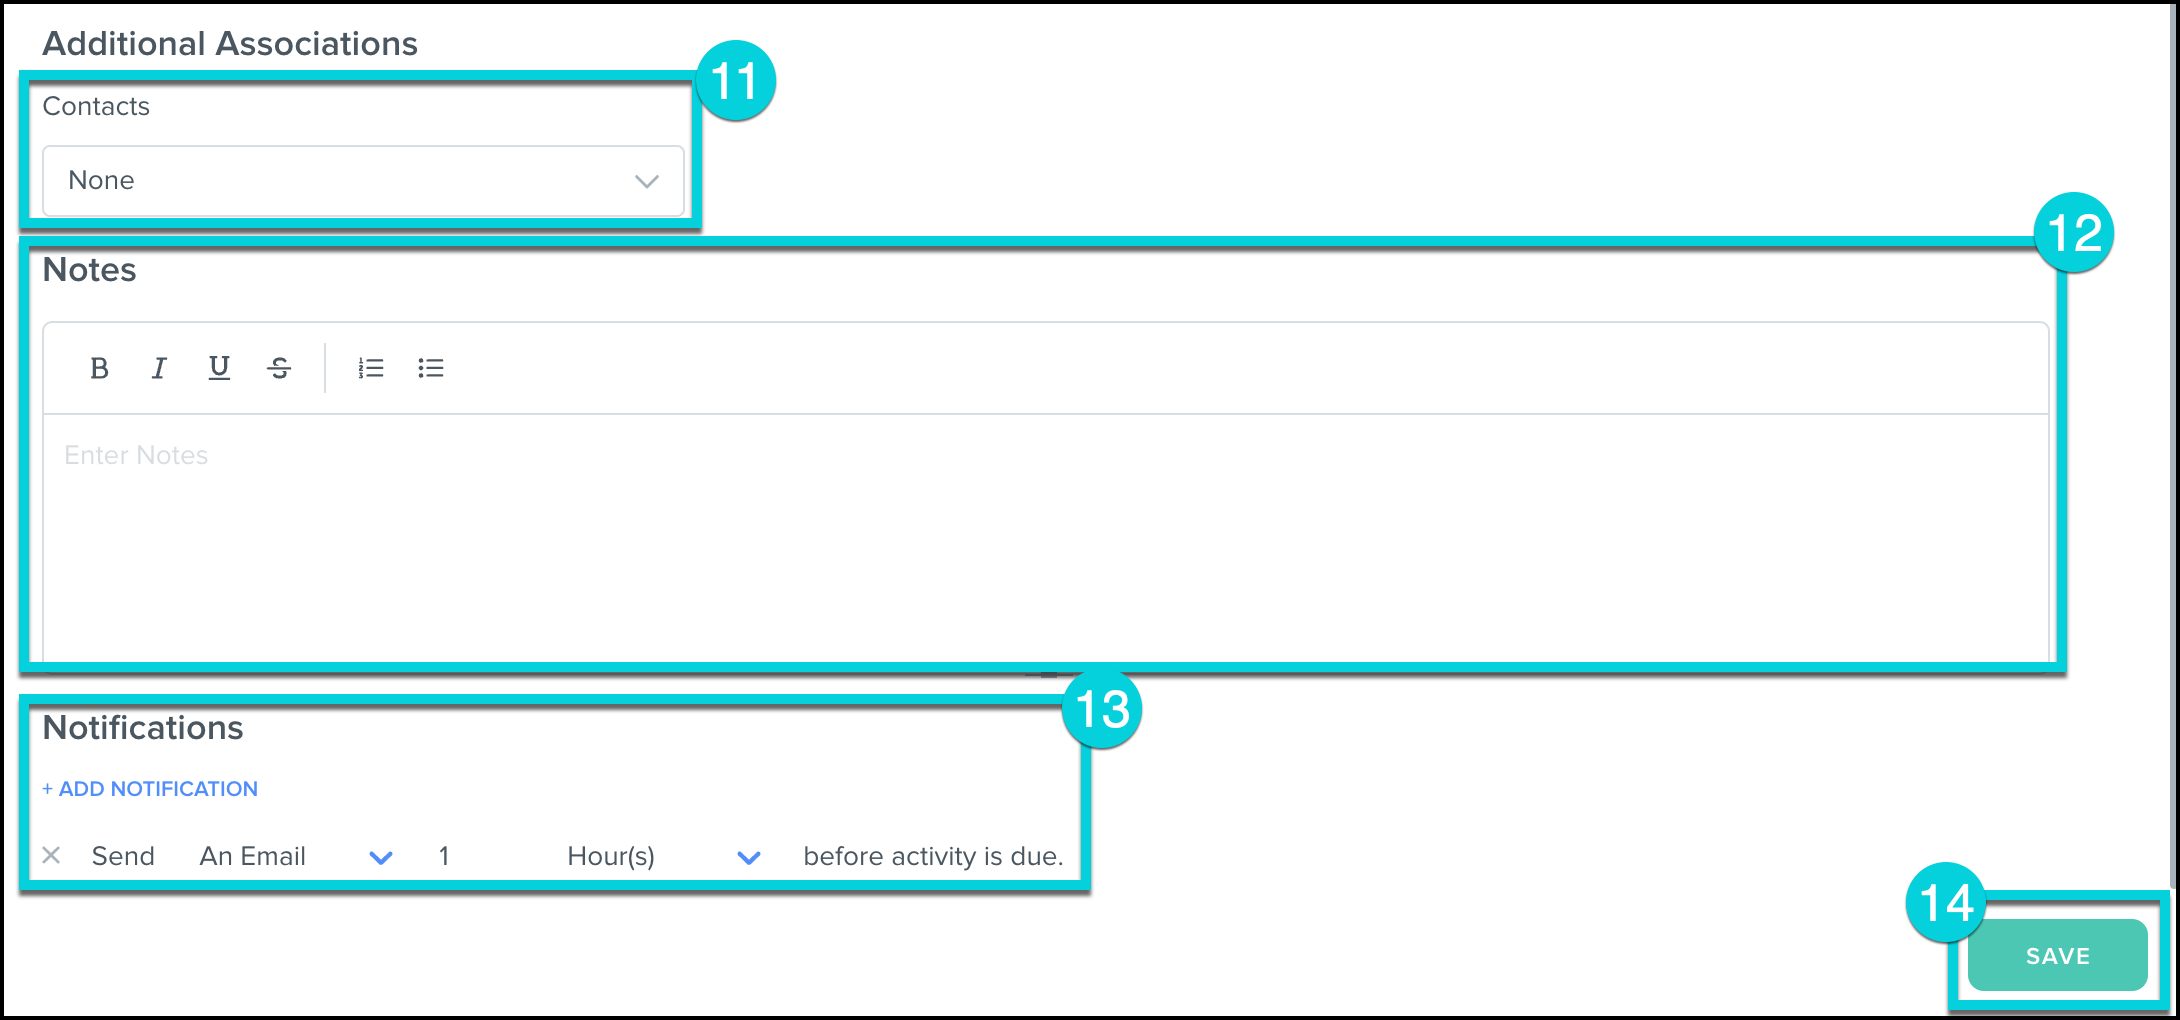
- Under Additional Associations, add any additional contacts.
- Under Notes, type any relevant notes to the activity.
- Under Notifications, schedule an email or text message to be sent out as a reminder that an activity will be due.
- Press Save.
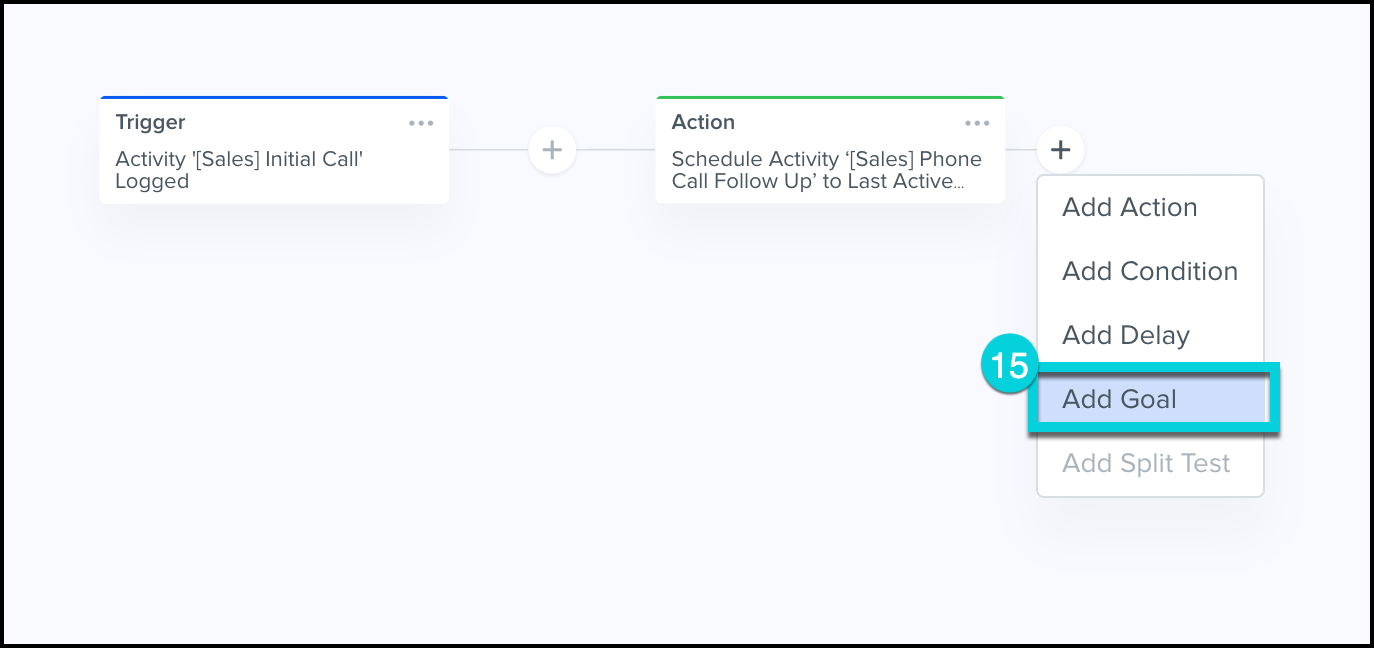
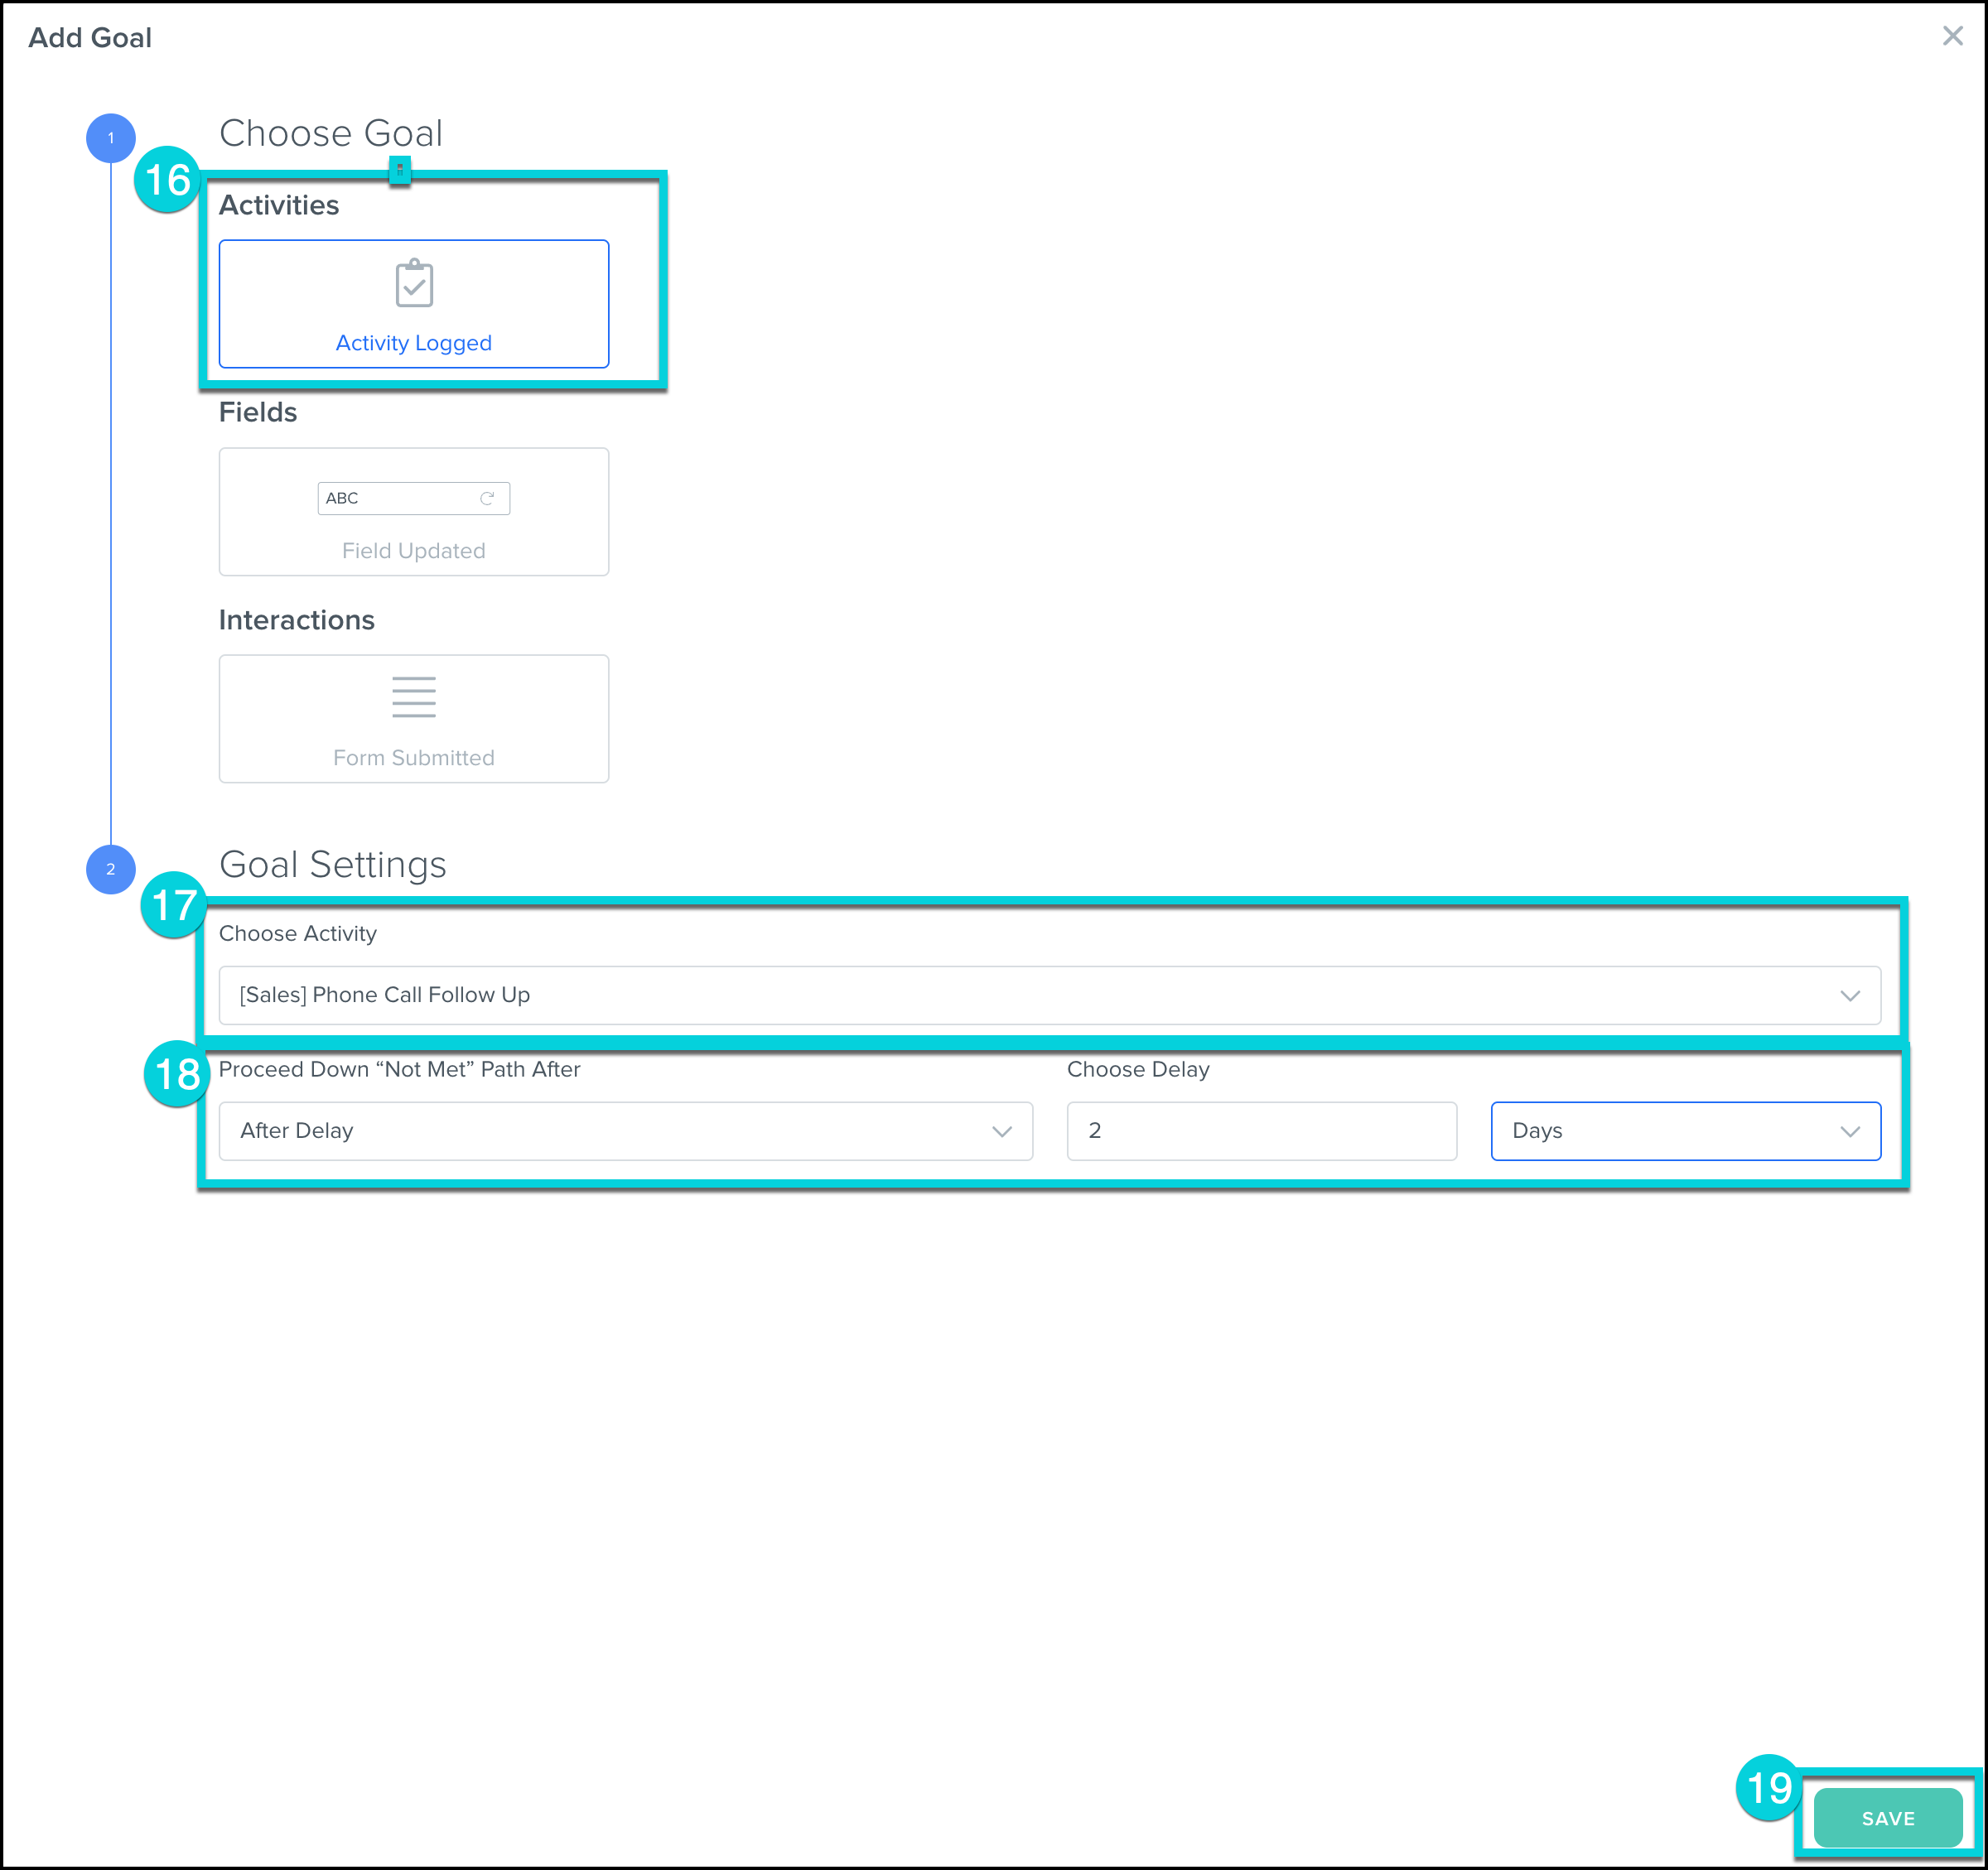
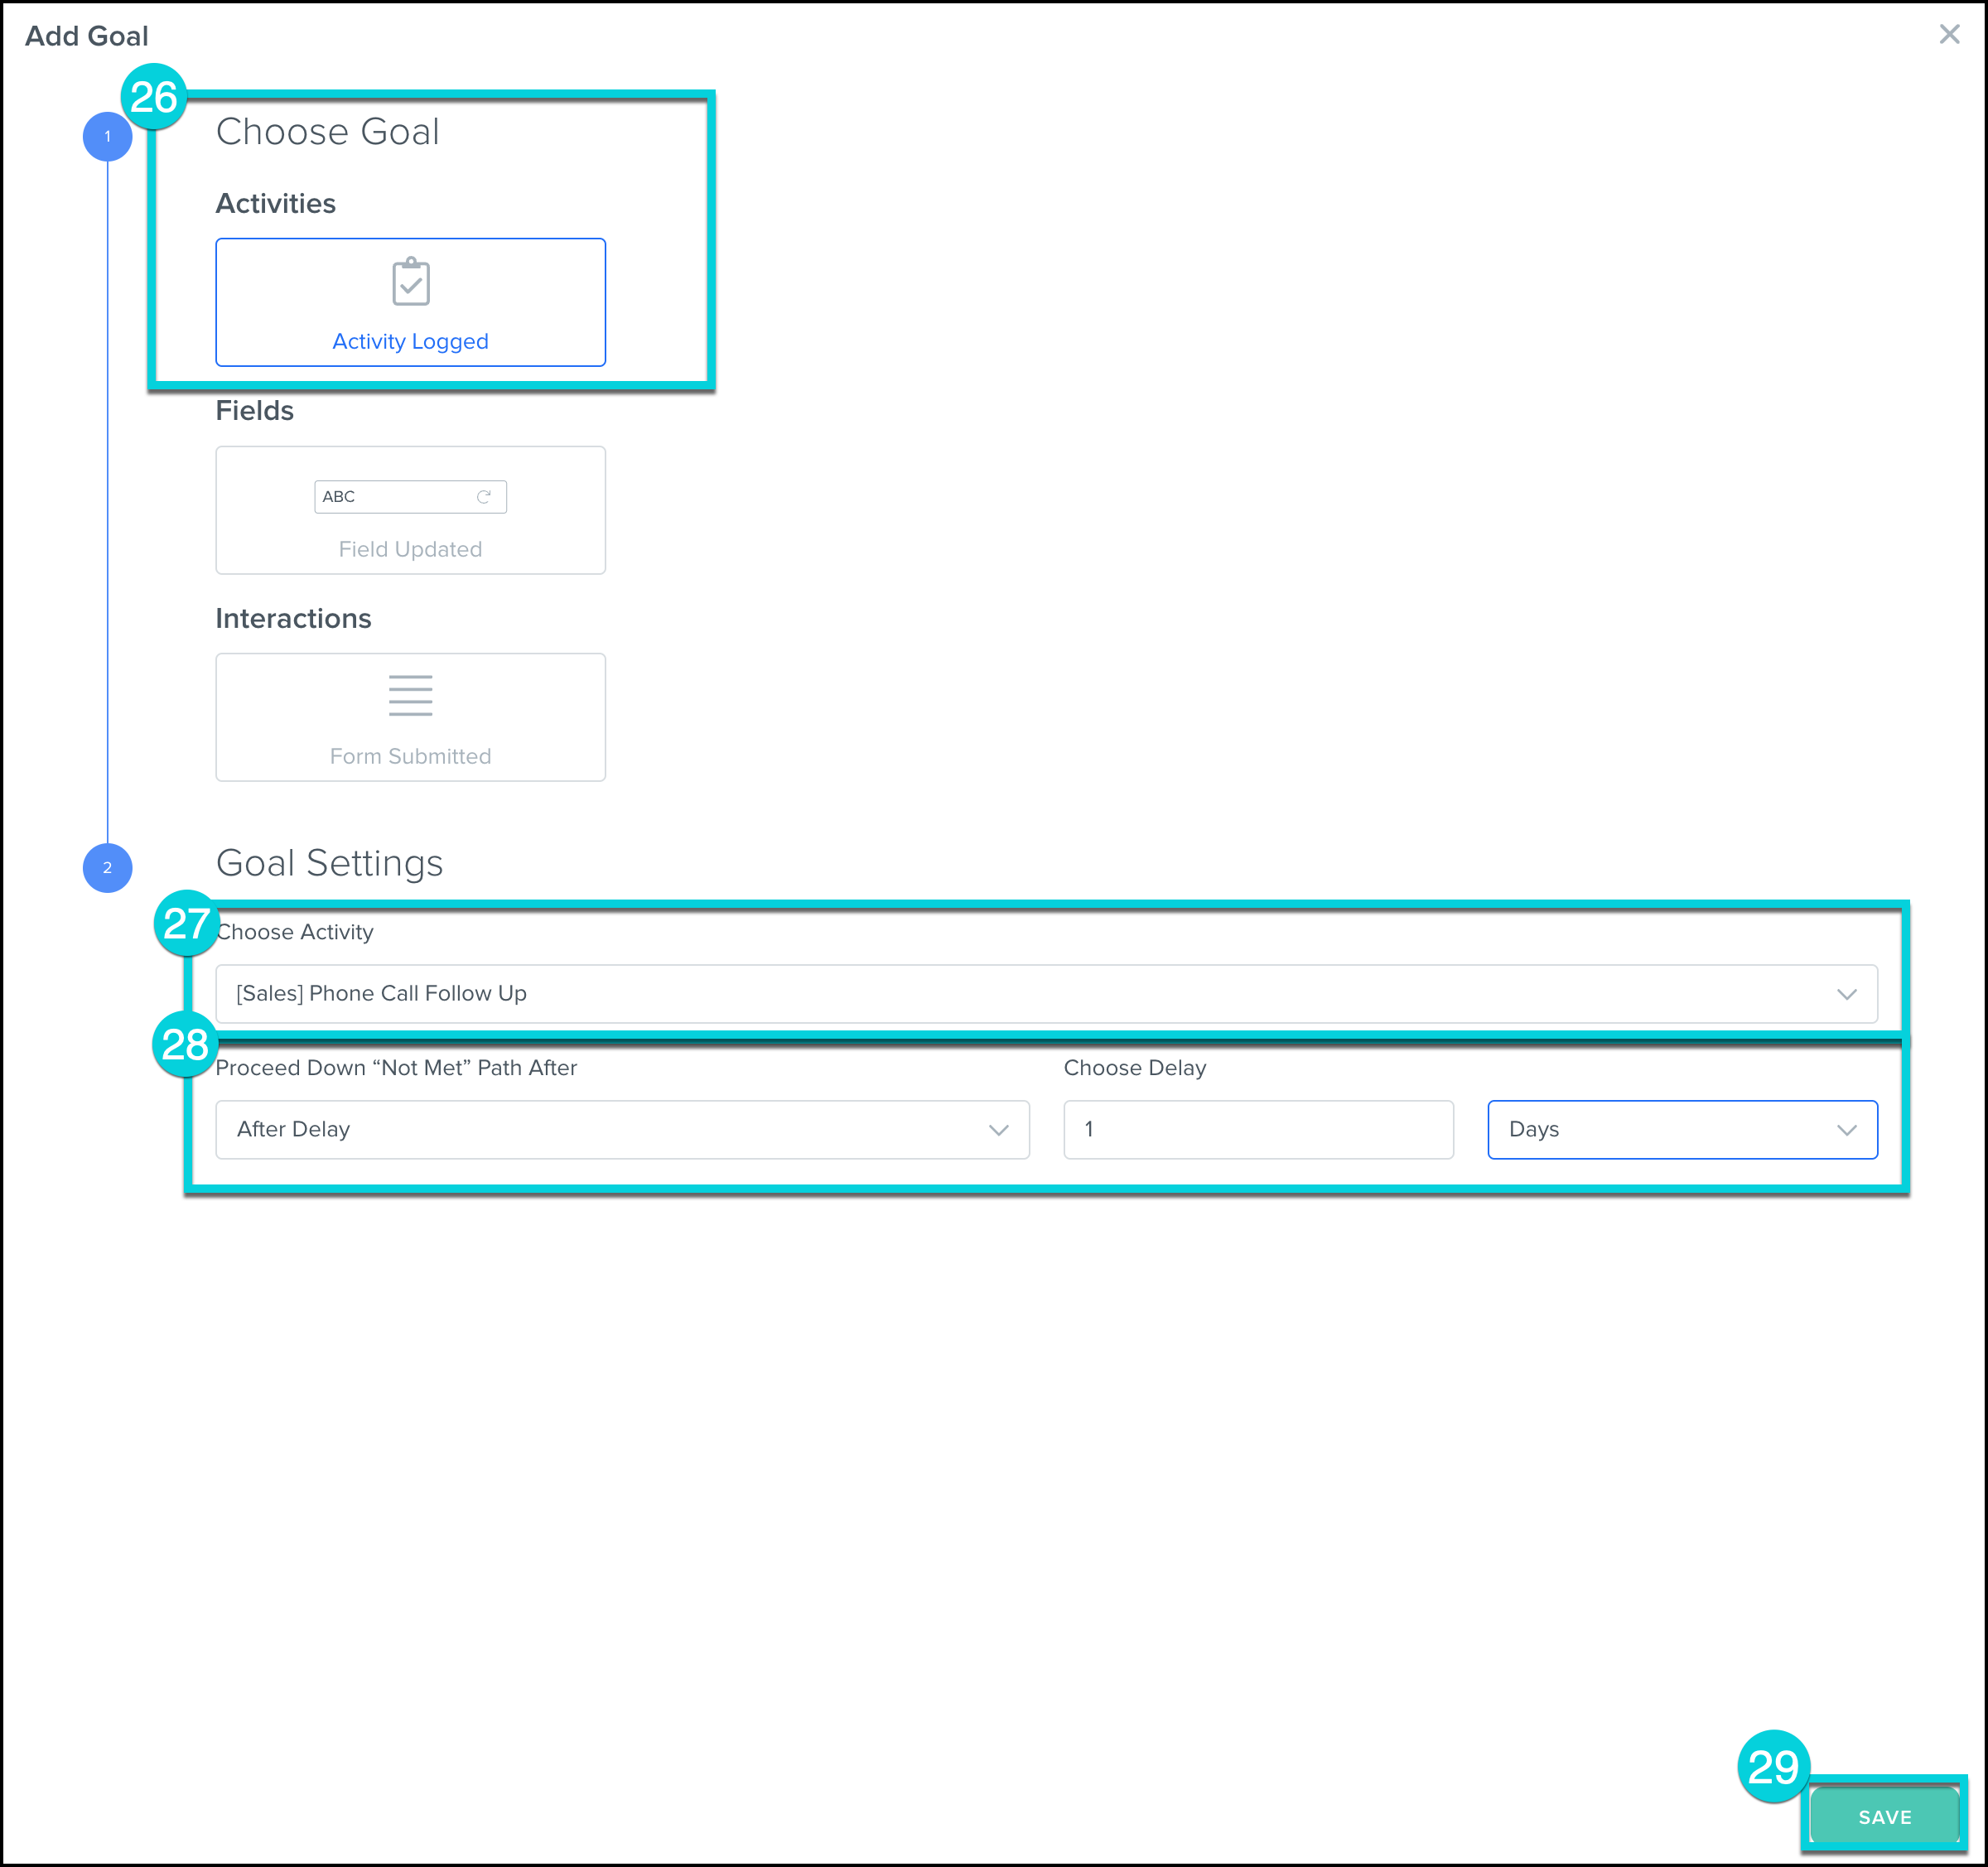
- Add a Goal to the Automation.
- Under Activities, select Activity Logged.
- Under Goal Settings, choose the activity you selected for the action. (In this example, we've used 'Sales: Phone Call Follow-Up)
- Under Proceed Down "Not Met" Path After, select between 'Never', 'After Delay', or 'On a Specific Date.'
- Press Save.
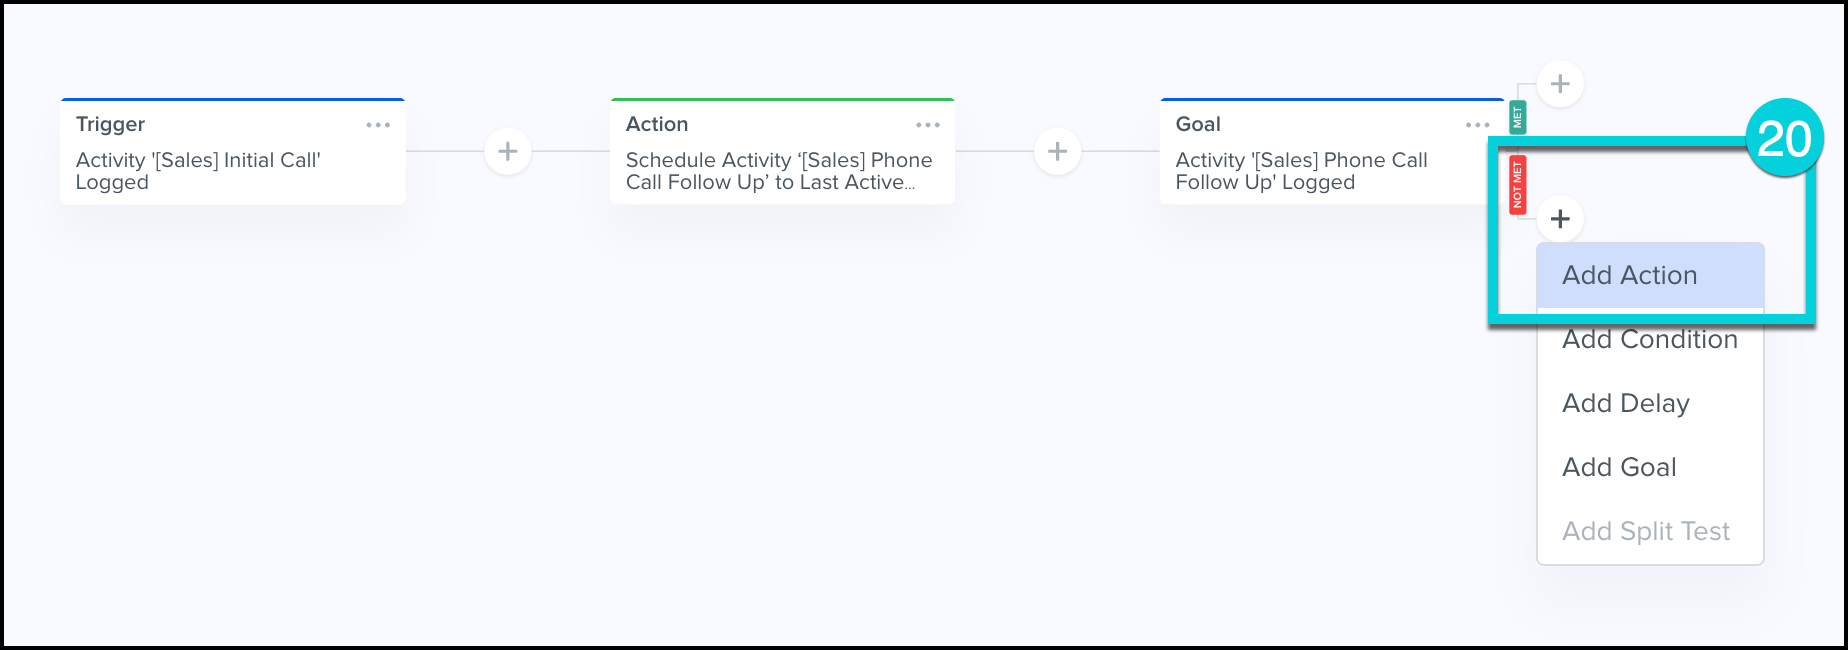
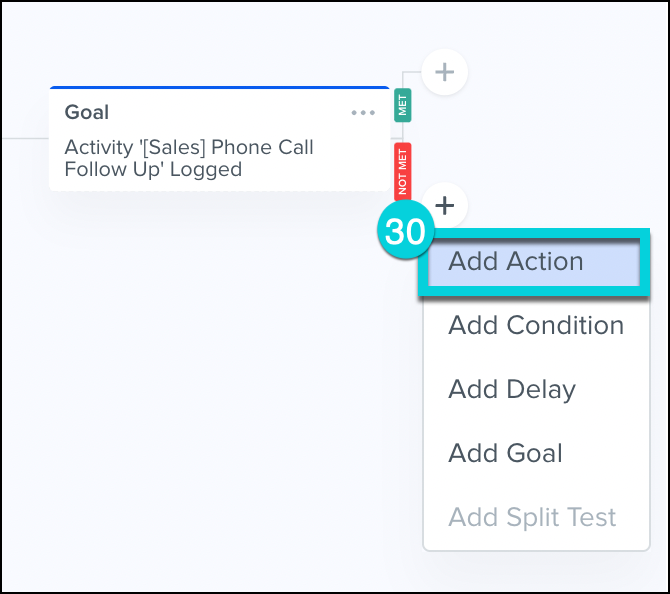
- Add an Action to the Automation under the 'Not Met' Path.
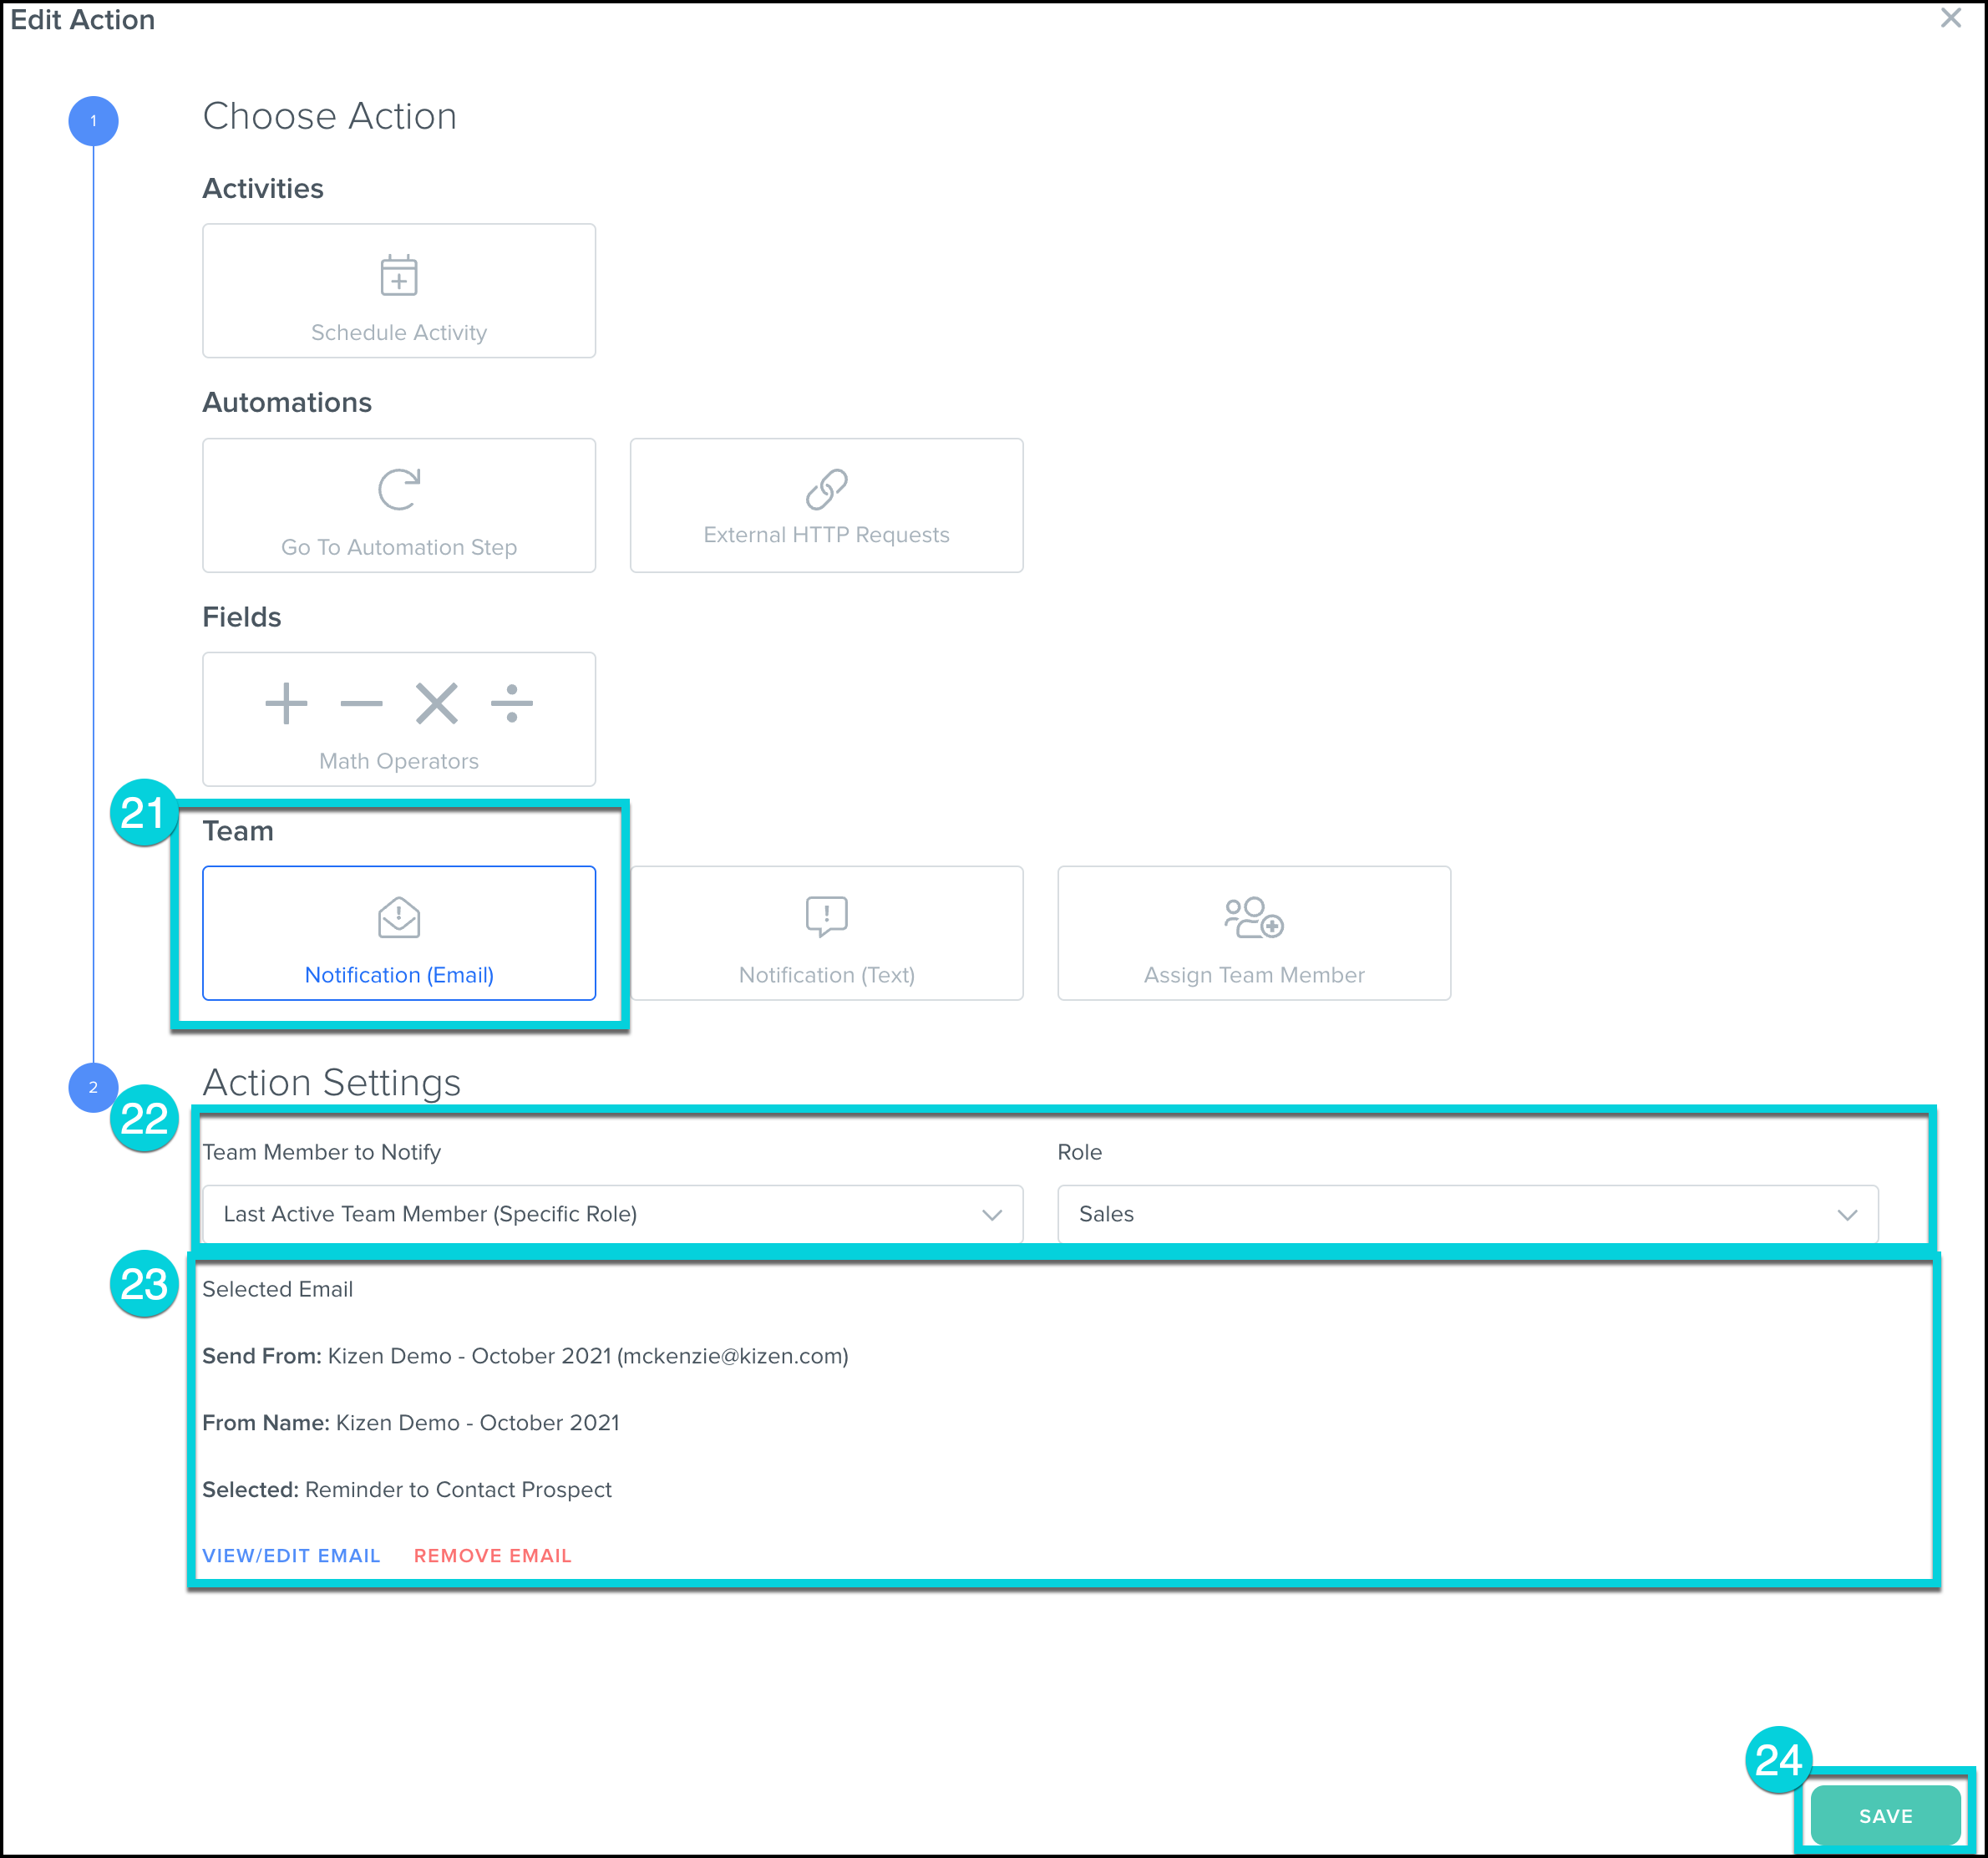
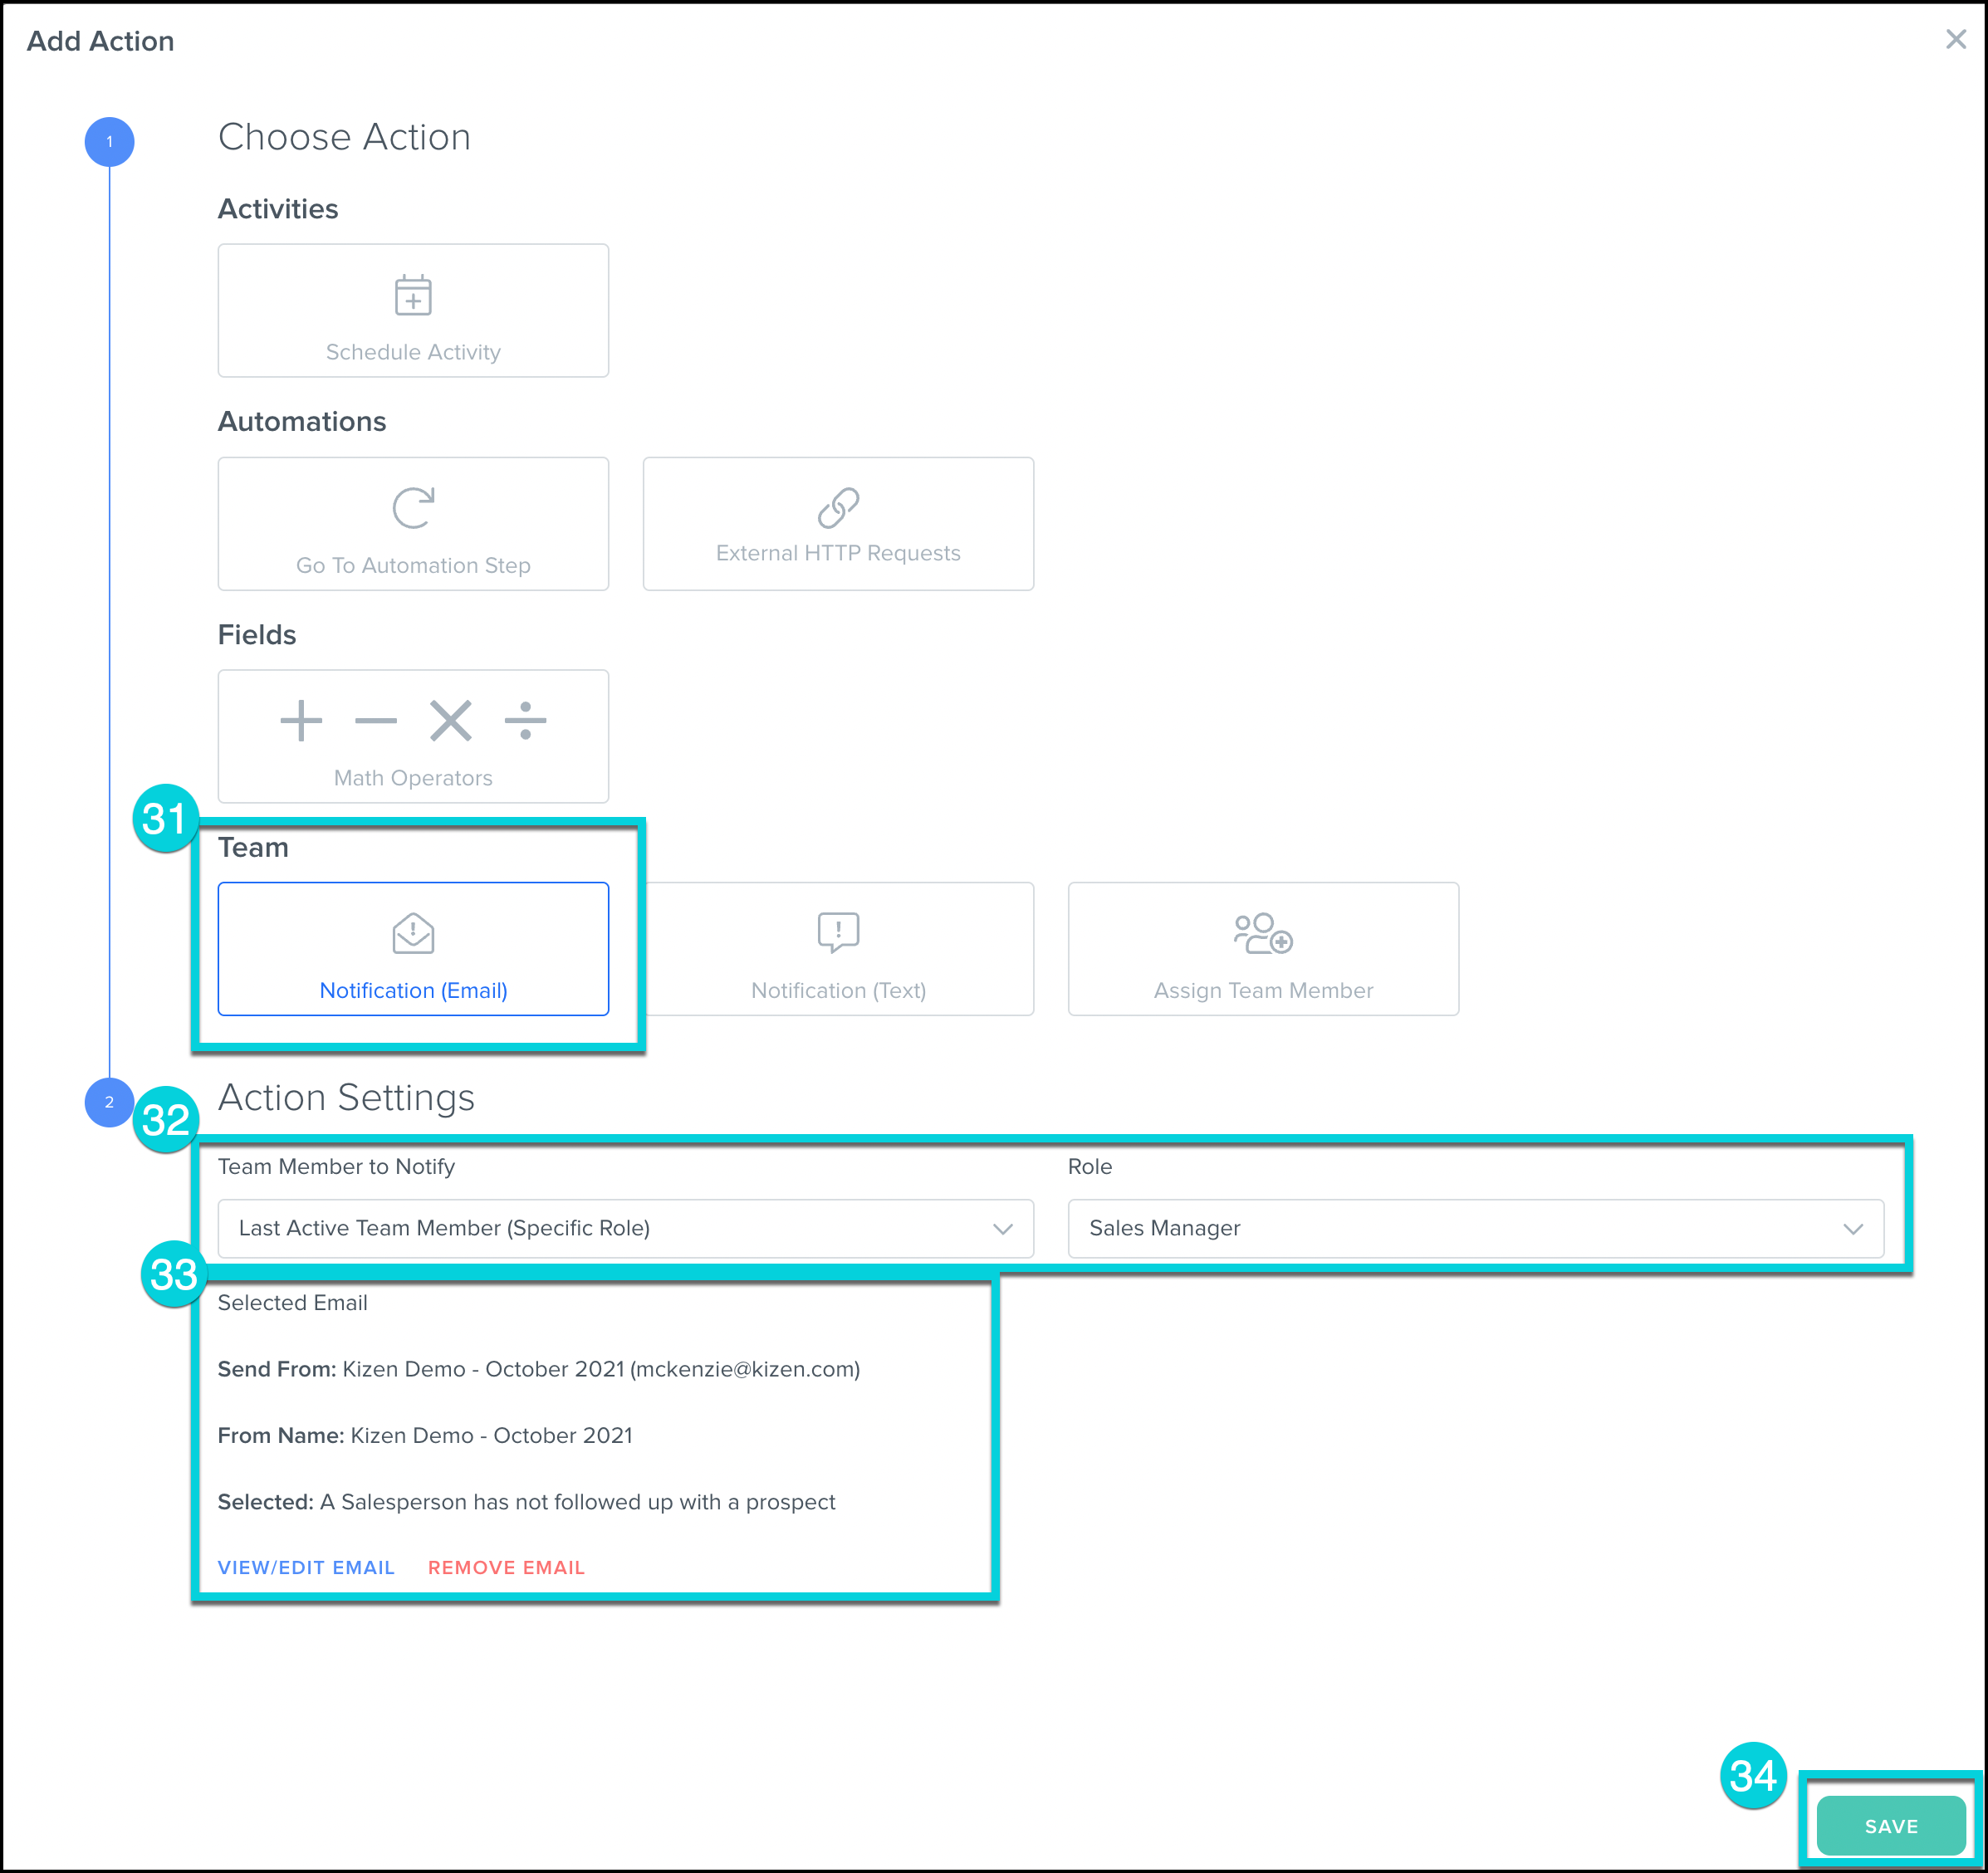
- Under Team, select Notification (Email)
- Under Action Settings, select which Team Member to Notify, and which Role they are in
- Choose an Email to Send from your library, or create a new email. (Tip: Subject line could be "Reminder to Call Prospect")
- Press Save.
- Add a Goal to the Automation.
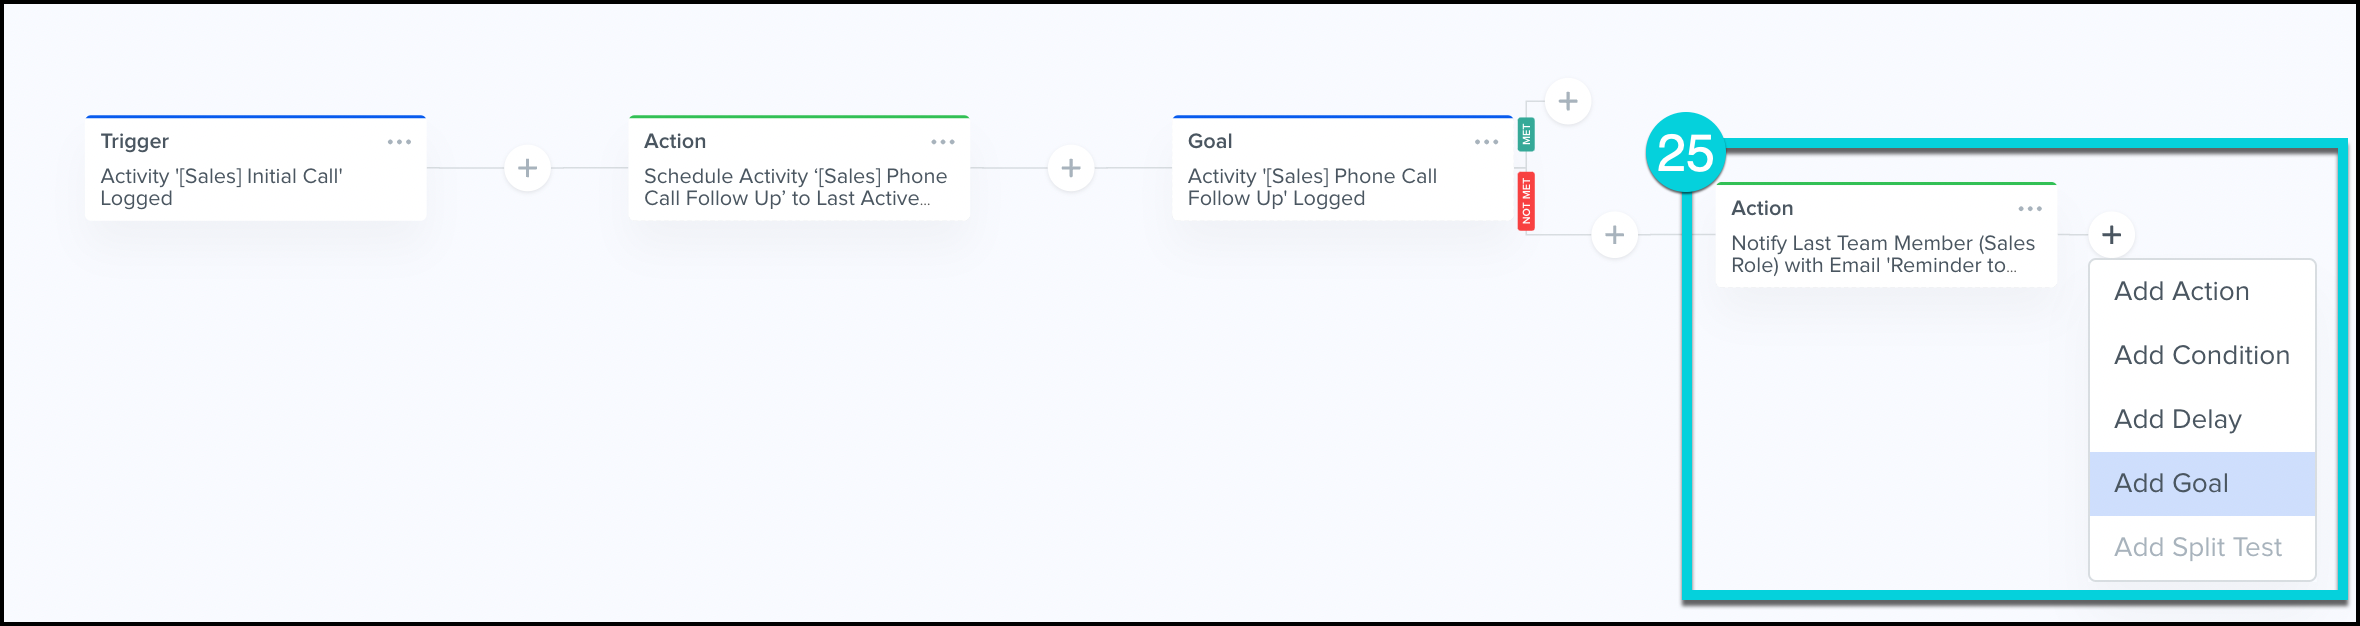
- Under Activities, select Activity Logged.
- Under Goal Settings, choose the activity you selected for the action. (In this example, we've used 'Sales: Phone Call Follow-Up)
- Under Proceed Down "Not Met" Path After, select between 'Never', 'After Delay', or 'On a Specific Date.'
- Press Save.
- Add Action to the Automation under the 'Not Met' Path.
- Under Team, select Notification Email.
- Under Team, select which Team Member to Notify and their Role. (In this step, we'll be notifying the Sales Manager)
- Choose an Email to Send from your library, or create a new email. (Tip: Subject line could be "A salesperson has not followed up with a prospect")
- Press Save.
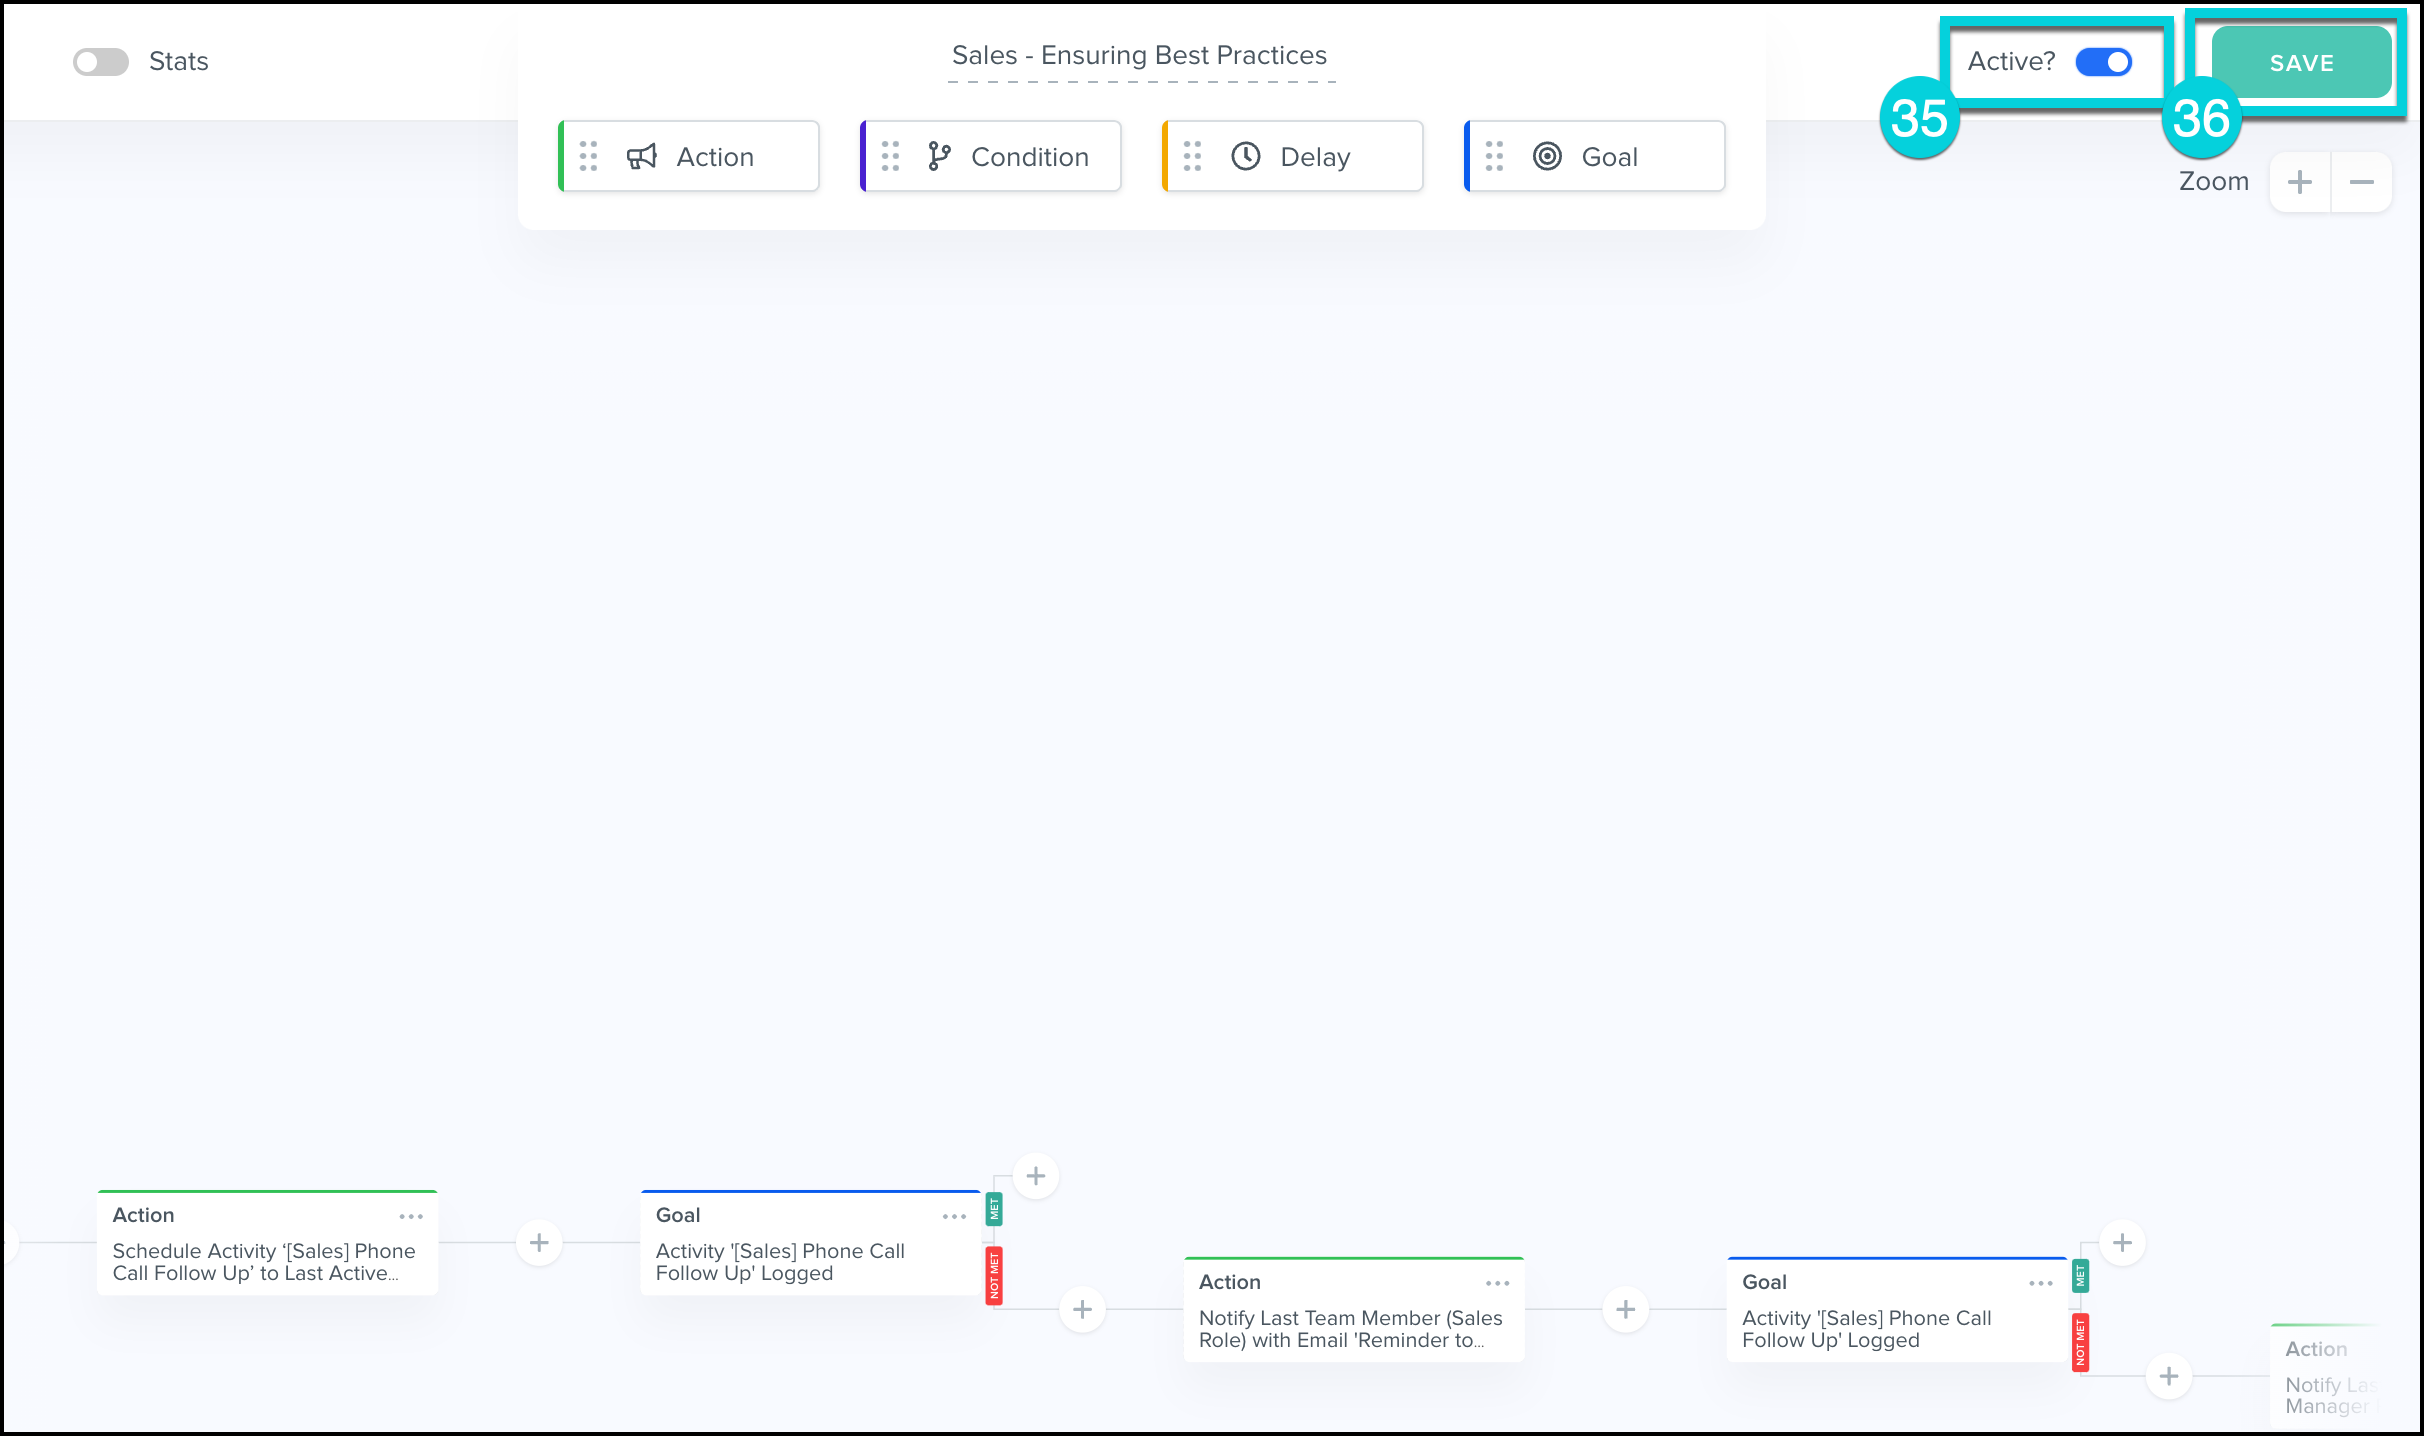
- Turn your Automation on by clicking the Active? switch.
- Save your Automation.